Creating a Custom Rule
Unduh
Mode fokus
Ukuran font
Scenarios
This task guides you to create a custom rule in the Config console to help you audit and evaluate resources.
Operation Steps
1. Log in to the Config console and go to the Compliance Audit > Rules page.
2. On the Rules page, select the rule application scope (you can select this account, a global account group, or a custom account group).

3. After confirming the rule application scope, click Create Custom Rule.

4. On the Basics page, enter the rule name, risk level, description, and rule function, and then click Next.

Note:
The rule function is a pre-created SCF function. You must create the service and function in advance on the SCF console. For detailed operations, see Creating an Event Function Using the Console.
When creating a function, select SCF Event Function as the function type and python 3.7 as the runtime environment. You can configure other parameters based on your actual requirements. The sample function code is as follows:
package mainimport ("context""encoding/json""fmt""github.com/tencentcloud/tencentcloud-sdk-go/tencentcloud/common""github.com/tencentcloud/tencentcloud-sdk-go/tencentcloud/common/errors""github.com/tencentcloud/tencentcloud-sdk-go/tencentcloud/common/profile"config "github.com/tencentcloud/tencentcloud-sdk-go/tencentcloud/config/v20220802""github.com/tencentyun/scf-go-lib/cloudfunction")// maingofunc main() {cloudfunction.Start(ReceiveMessage)}type Tag struct {TagKey stringTagValue string}type ClientContext struct {InvokingEvent *InvokingEventRuleParameters map[string]string // Rule parametersResultToken string // Encryption tokenOrderingTimestamp int64 // Evaluation timestamp}type InvokingEvent struct {TriggerType stringConfigurationItem *ConfigurationItem}type ConfigurationItem struct {AccountId int64 // ID of the user to whom the resource belongsRegion string // Resource regionZone string // Resource AZConfiguration string // Detailed resource configurationResourceCreationTime int64 // Resource creation timestampResourceType string // Resource typeResourceId string // Resource IDResourceStatus string // Resource IDResourceName string // Resource nameTags []Tag // Resource tagsCaptureTime int64 // Resource snapshot timestamp}// ReceiveMessage receives consumption messages {// "InvokingEvent": {// "TriggerType": "MANUAL",// "ConfigurationItem": {// "AccountId": 100004293724,// "Region": "ap-guangzhou",// "Zone": "",// "Configuration": { // The fields within the Configuration object vary by resource type// "CidrBlock": "172.16.0.0/16",// "IsDefault": true,// "Ipv6CidrBlock": "",// "DnsServerSet": null,// "DomainName": "",// "DhcpOptionsId": ""// },// "ResourceCreationTime": 1520431078,// "ResourceType": "QCS::VPC::Vpc",// "ResourceId": "vpc-q252nx9j",// "ResourceStatus": "",// "ResourceName": "Default-VPC",// "Tags": null,// "CaptureTime": 1686500243// }// },// "RuleParameters": {// "234": "324"// },// "ResultToken": "Wm9yZlY3WmlKa3cxaW1oQpgtklO2shRhG1gtxnC4qyszJtkSz5ZpZDshF6YyaaIAagGsEAcidC-VFNJHtRfXfam_FHMR_RhhelEAT4ApsKFQIBEZNaWN284dZS02f7uRT6w_zwHz5E1dXmNYvancDRgiCQHip_uUrif0Toypdbh1tuLODHgVN1csbaPKu3hb2-O-PBh824HACVUkDXJAp2KMQnqhNagmlUULjY-GMyM=",// "OrderingTimestamp": 1686537830//}func ReceiveMessage(ctx context.Context, event ClientContext) error {eventStr, _ := json.Marshal(event)fmt.Println("SCF:ReceiveMessage:Event:", string(eventStr))putRuleResule(event)return nil}// Custom compliance check for resources --- To evaluate resources, you must implement the evaluation logic based on your specific business needs, returning COMPLIANT or NON_COMPLIANT. The following code is for reference only.func getComplianceType(configurationStr string) string {return "COMPLIANT"}func putRuleResule(event ClientContext) {evaluations := make([]*config.Evaluation, 0)//1: Set the evaluation result. The format must comply with the following example requirements.complianceType := getComplianceType(event.InvokingEvent.ConfigurationItem.Configuration)configuration := "xxxx"desiredValue := "xxxxx"evaluation := &config.Evaluation{ComplianceResourceId: &event.InvokingEvent.ConfigurationItem.ResourceId,ComplianceResourceType: &event.InvokingEvent.ConfigurationItem.ResourceType,ComplianceRegion: &event.InvokingEvent.ConfigurationItem.Region,ComplianceType: &complianceType,Annotation: &config.Annotation{Configuration: &configuration,DesiredValue: &desiredValue,},}evaluations = append(evaluations, evaluation)//2: Report the evaluation result// Requires the Config_QCSLinkedRoleInConfigRecorder service role permissioncredential := common.NewCredential("xxxx","xxxxx",)cpf := profile.NewClientProfile()cpf.HttpProfile.Endpoint = "config.internal.tencentcloudapi.com"client, _ := config.NewClient(credential, "ap-guangzhou", cpf)request := config.NewPutEvaluationsRequest()request.ResultToken = &event.ResultTokenrequest.Evaluations = evaluationsresponse, err := client.PutEvaluations(request)if _, ok := err.(*errors.TencentCloudSDKError); ok {fmt.Printf("An API error has returned: %s", err)return}if err != nil {panic(err)}// Output a string packet in JSON format.fmt.Printf("%s", response.ToJsonString())}
Note:
For detailed function descriptions, refer to the comments in the code above.
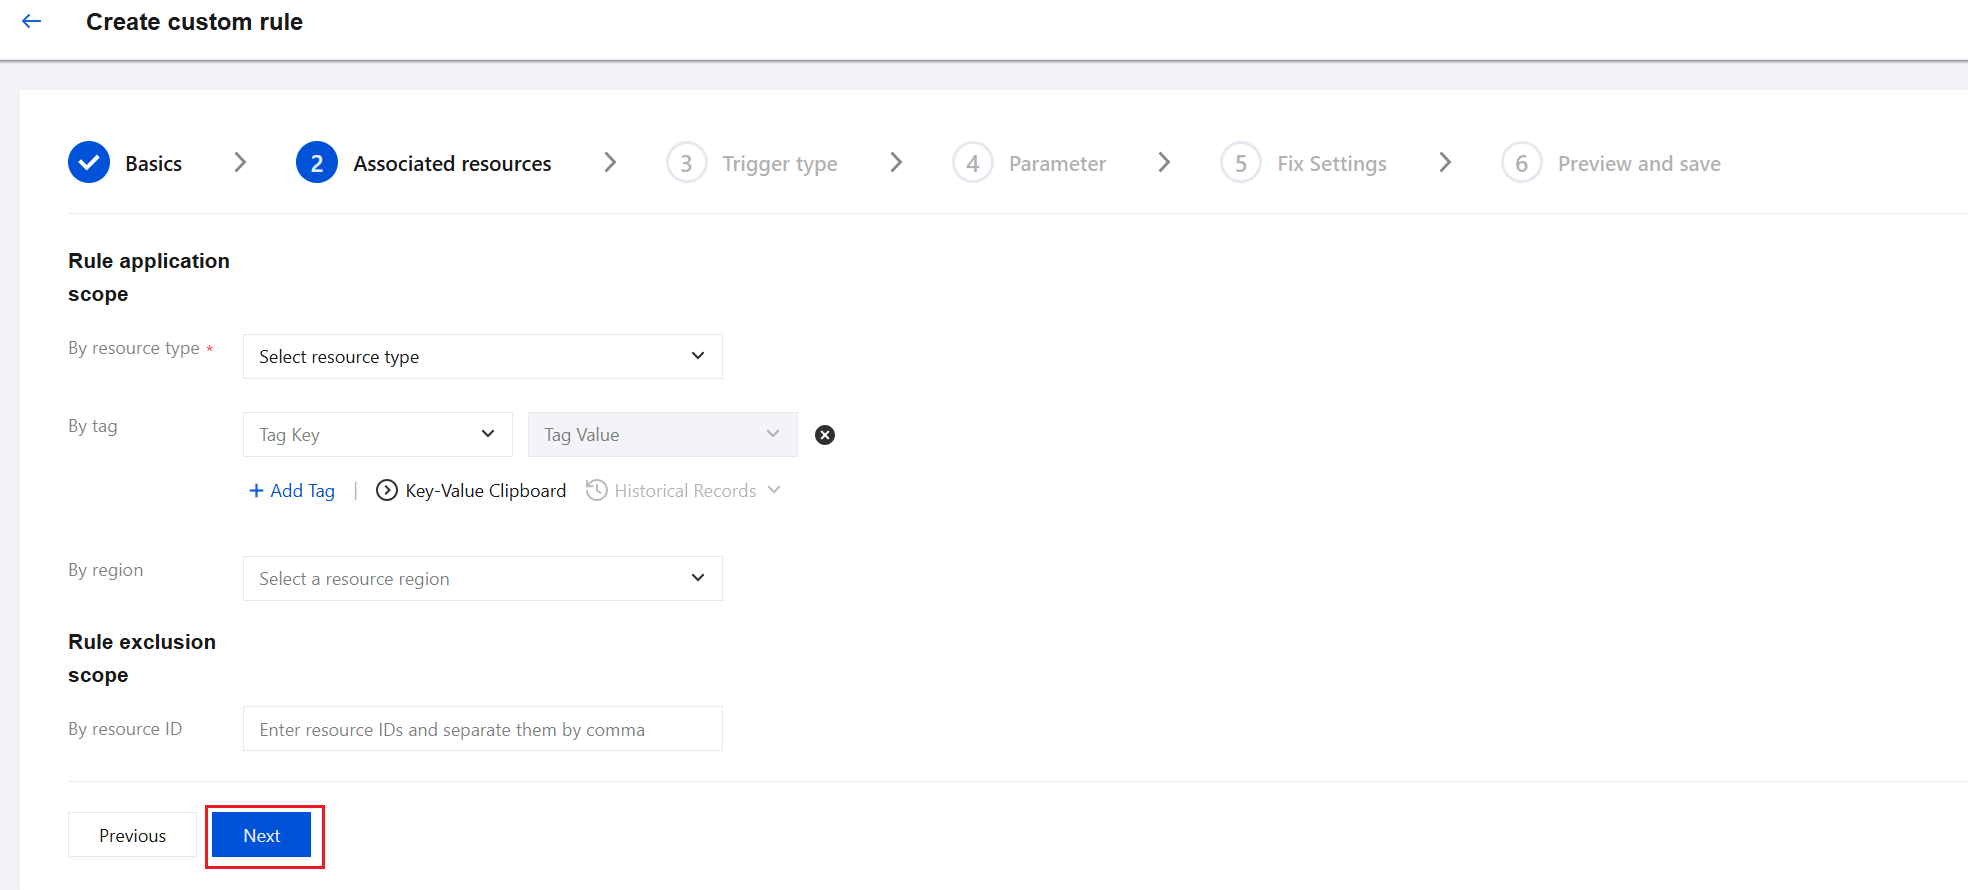
5. On the Associated Resources page, in the By Resource Type module, select the applicable resource type. You can optionally define the application scope by Tag or region as needed, or exclude resources by resource ID. Then, click Next.
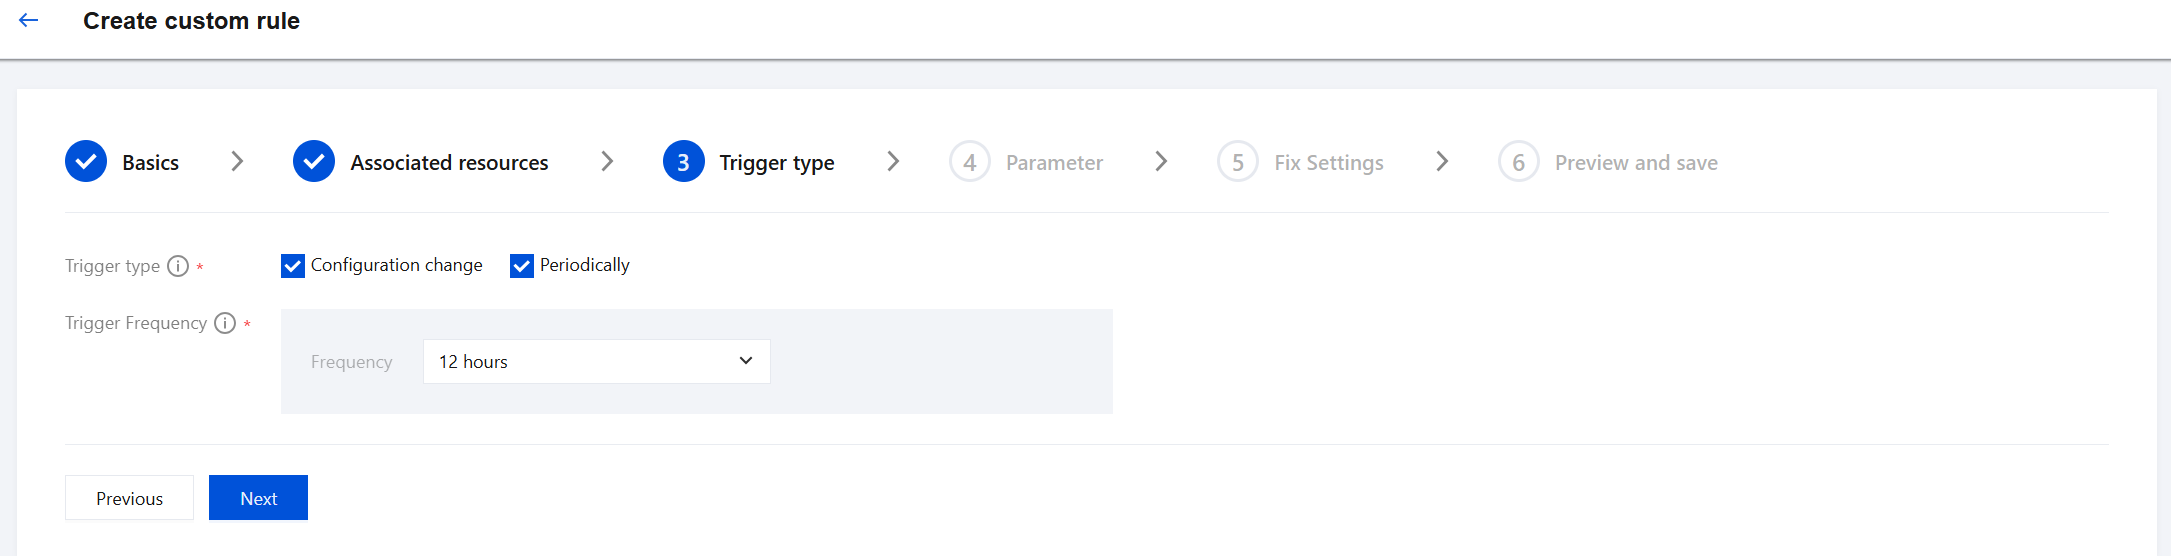
6. On the Trigger type page, select the rule trigger type and trigger frequency as needed, and then click Next.
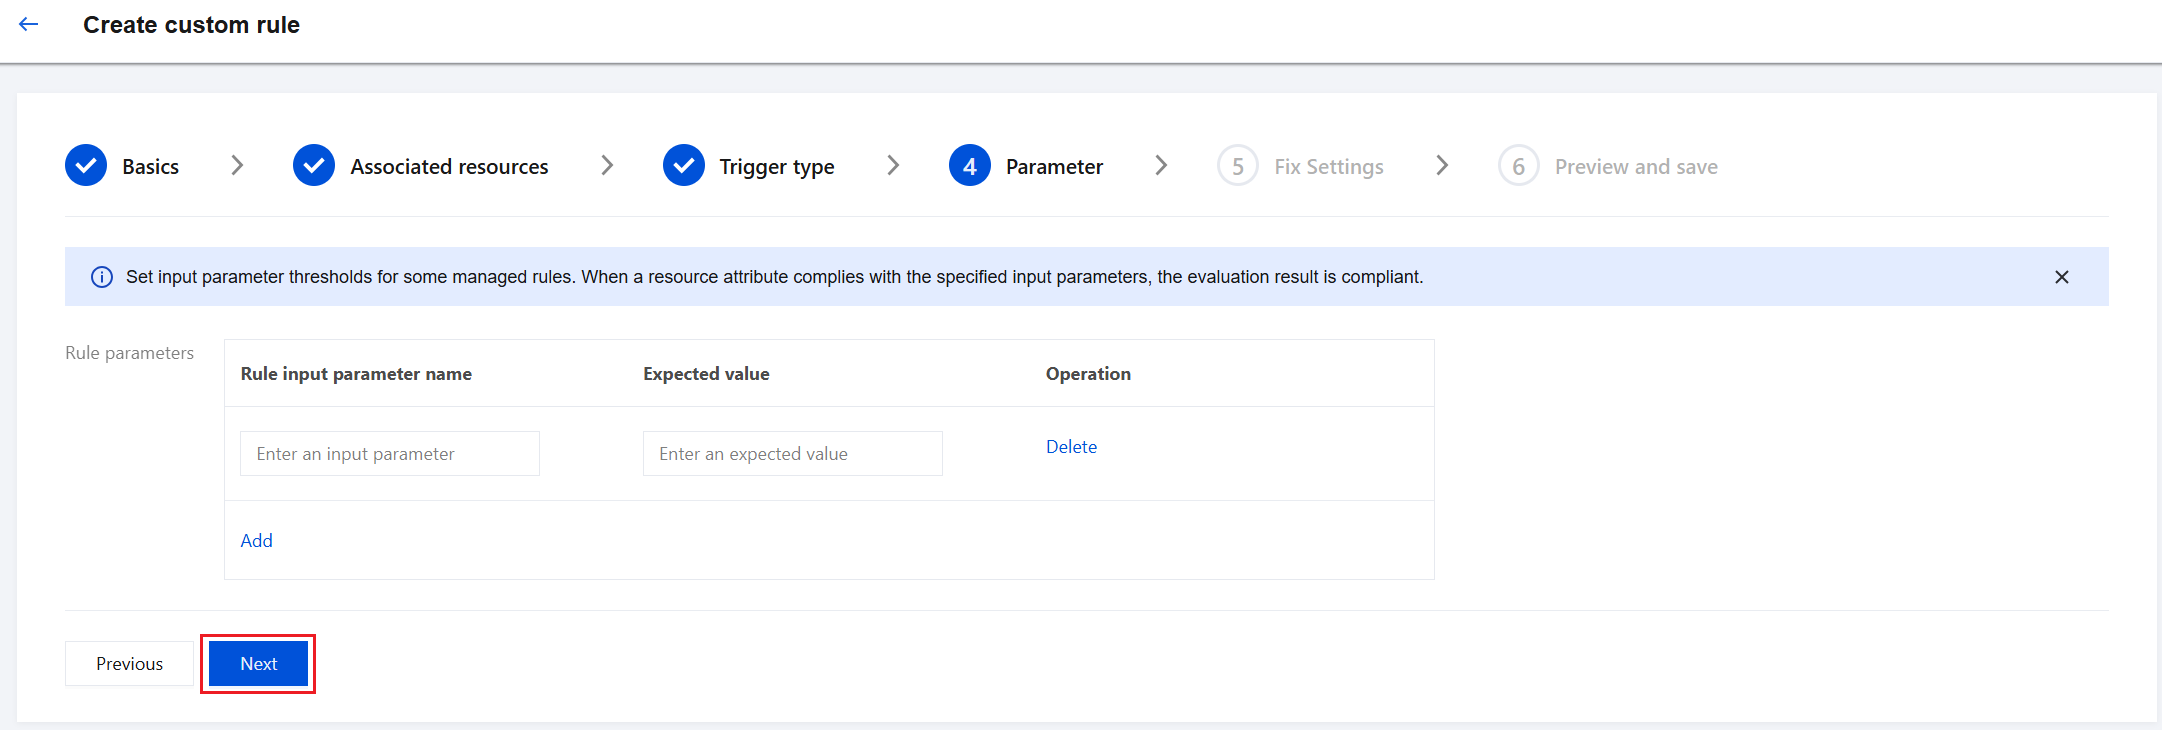
7. On the Parameter page, set the rule parameter values and click Next.
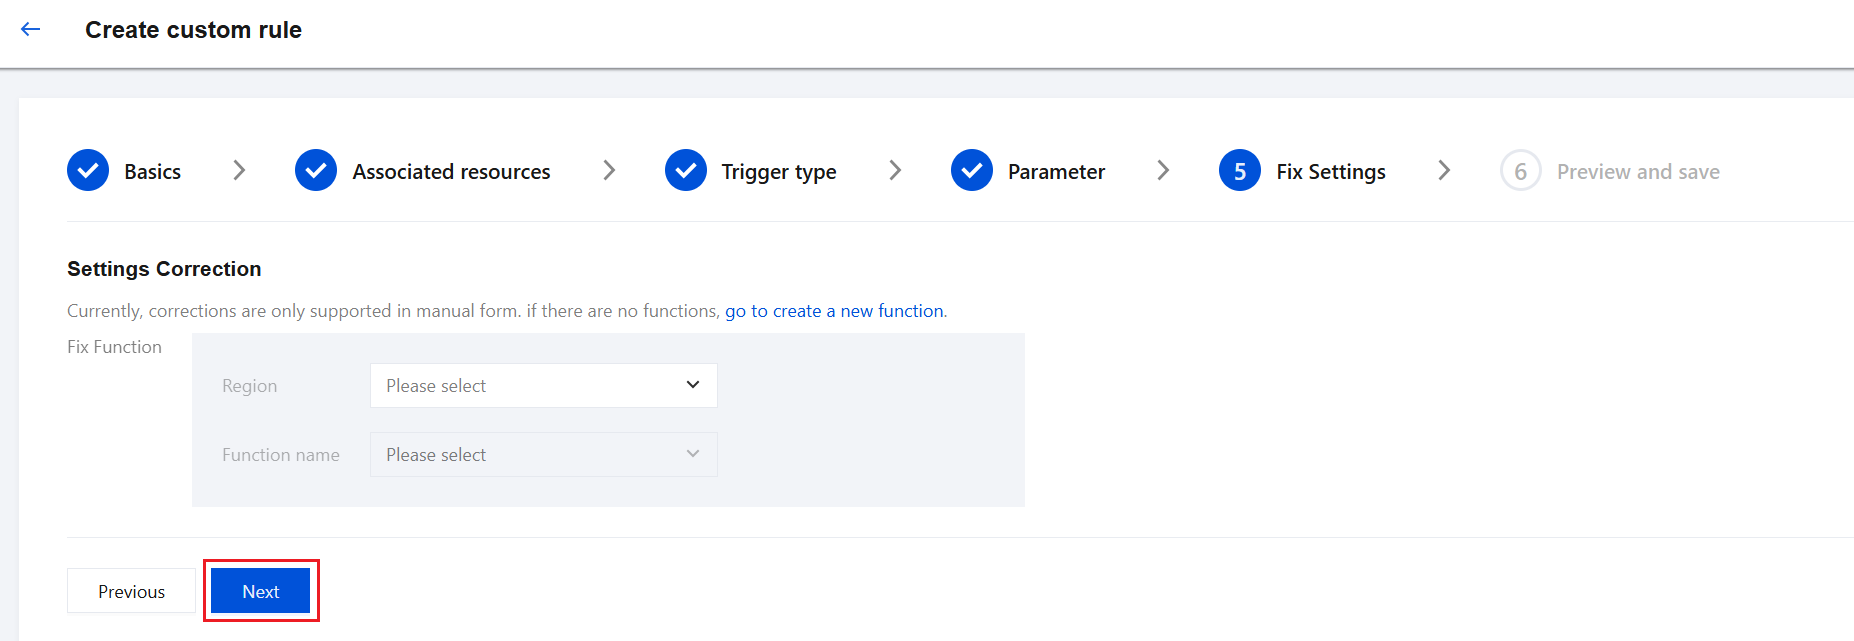
8. On the Fix Settings page, select the region and function name corresponding to the remediation function, and click Next. If no remediation function exists, you can click go to create a new function to perform the corresponding operation.
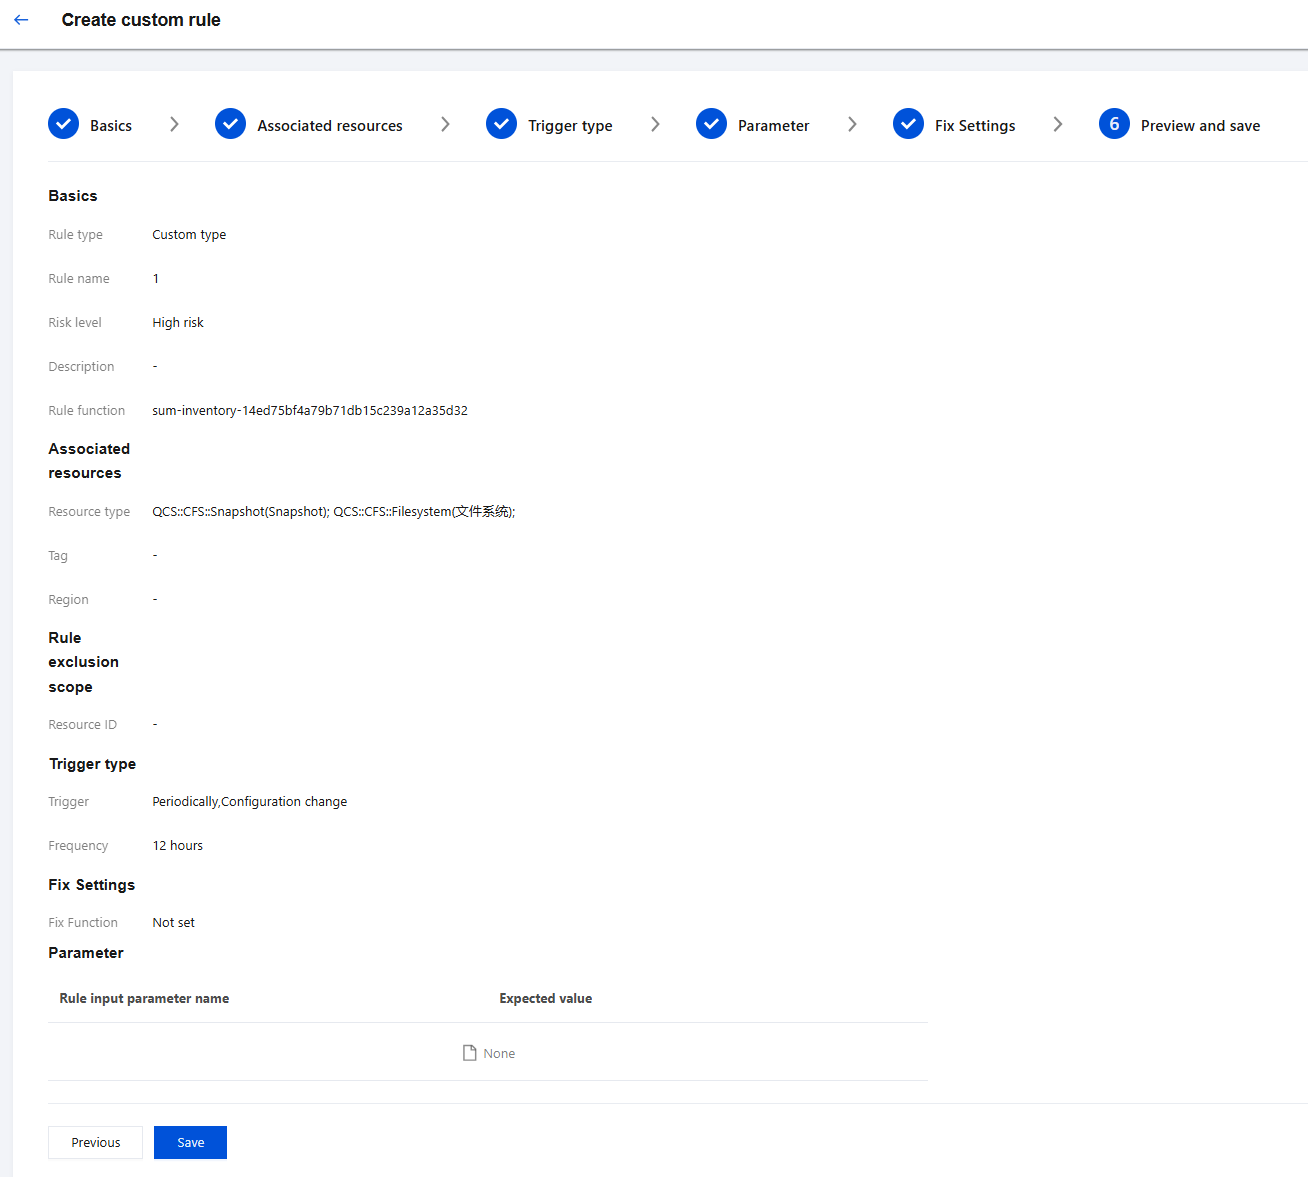
9. On the Preview and Save page, you can view the information of the custom rule to be created. You can also return to the previous step as needed. After confirming that everything is correct, click Save to successfully create the rule.
Bantuan dan Dukungan
Apakah halaman ini membantu?
Anda juga dapat Menghubungi Penjualan atau Mengirimkan Tiket untuk meminta bantuan.
masukan