Creating Read-Only Instance
Download
Focus Mode
Font Size
This document describes how to create read-only instances/nodes with provisioned resources for a cluster whose instance mode is provisioned resources, using the TDSQL-C for MySQL console.
To enable Serverless for a cluster whose instance mode is provisioned resources in order to add Serverless read-only nodes, see Enabling or Disabling Serverless for a Provisioned Resources Cluster.
To learn about operations for clusters whose instance mode is Serverless, see Read-Only Instance Management.
Scenarios
TDSQL-C for MySQL allows you to create one or more read-only instances for a cluster to support read/write separation and one-write-multiple-read scenarios. Adding read-only instances can significantly enhance the read load capacity of a database cluster.
TDSQL-C for MySQL clusters support two instance types: read-write instance and read-only instance. Based on the instance mode, read-only instances are further categorized into provisioned resources read-only instances and Serverless read-only instances.
TDSQL-C for MySQL clusters provide private network addresses for read/write and read only by default. Users can access all read-only instances through the cluster's private network address for read only. After a read-only instance is created, when you access the new read-only instance via the cluster's private network address for read only, the access request is automatically forwarded to that read-only instance.
The cost of a read-only instance is the same as that of a read-write instance. For details, see Product Pricing.
Note
Note
Read-only instances and read-write instances share the same storage, eliminating the need to maintain accounts and databases.
Read-only instances do not need to stay synchronized with read-write instances via binlog, nor do they require data replication or migration. Typically, a read-only instance can be created in seconds.
The latency between read-only instances and read-write instances is typically at the millisecond level. You can view this latency using the read-only instance latency monitoring metrics on the Monitoring and Alarms page.
The instance specifications of read-only instances can differ from those of the read-write instance. However, to facilitate configuration adjustments based on load conditions, it is recommended that the specifications of all read-only instances remain consistent.
When you add a yearly/monthly subscription read-only instance to a yearly/monthly subscription cluster, the expiration time of the newly added instance is set to match that of the cluster.
Security Group Overview
If a security group has been configured for the read-write instance in a cluster, the read-only instance will inherit that security group by default when it is created (deletion is not supported). You can also add other security group policies to that read-only instance.
If no security group is configured for the read-write instance in a cluster, you can freely choose whether to configure a security group for the read-only instance when creating it. The creation of the read-only instance is supported regardless of whether a security group is configured.
Operation Steps
On the cluster list page, perform operations based on the view mode you are actually using:
1. Log in to the TDSQL-C for MySQL console and click the target cluster in the cluster list on the left to go to the Cluster Management page.
2. On the cluster details page, click the "+" in the read-only instance section of the topology diagram, or click Add Now under the read-only instance information on the right.
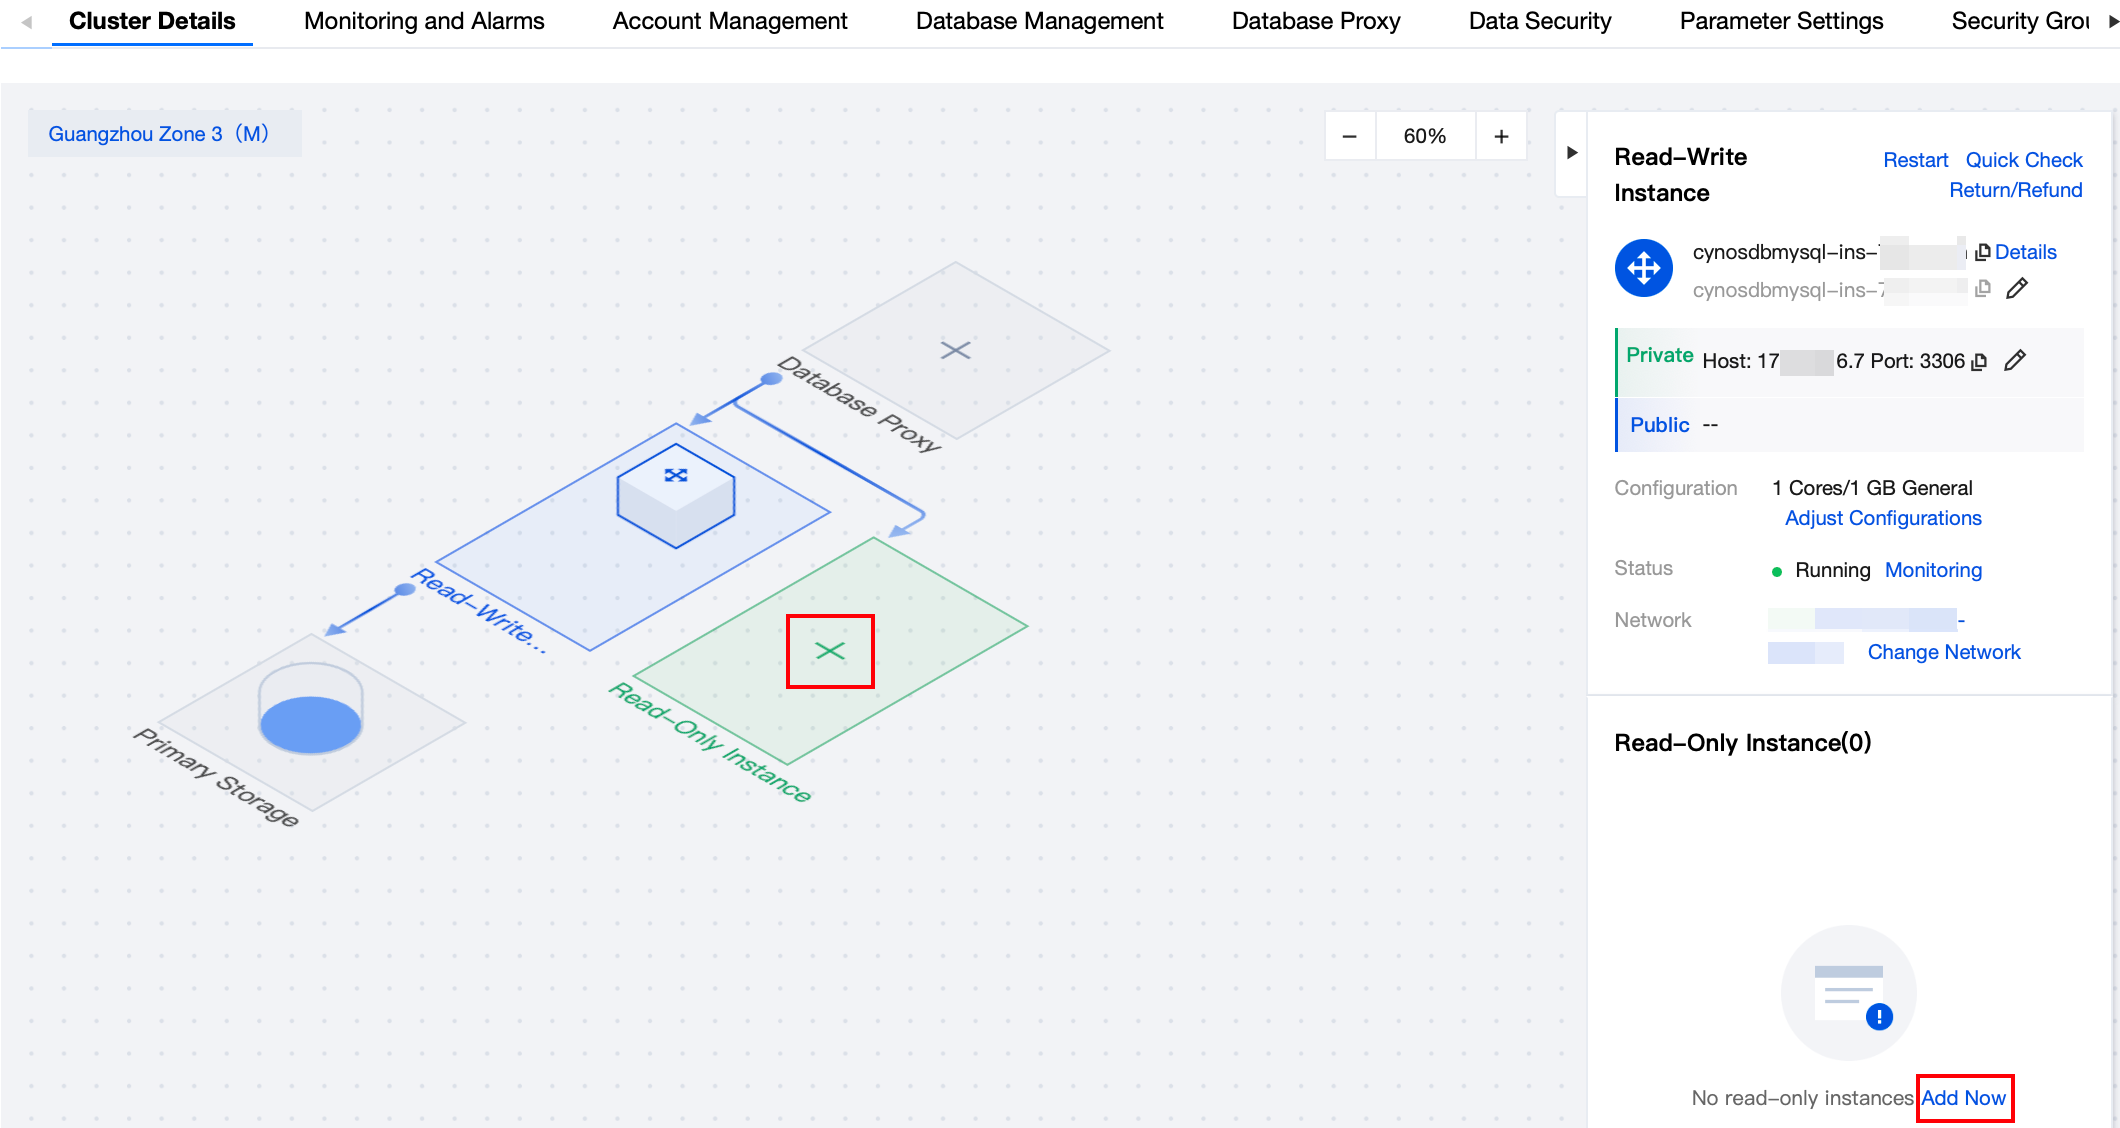
3. Navigate to the purchase page, select the corresponding configuration for the read-only instance, and after confirming the details, click Buy Now to create the read-only instance. Once the creation is successful, you can view the newly added read-only instance on the instance list page of the cluster.
1. Log in to the TDSQL-C for MySQL console. In the cluster list, click the Cluster ID/Cluster Name or the Manage button in the Operation column to go to the cluster management page.
2. On the cluster management page, select the Instance List tab, then choose Read-Only Instance > Add Read-Only Instance to go to the read-only instance purchase page.

3. On the purchase page, select the corresponding configuration for the read-only instance. After the details are confirmed, click Buy Now for creation of the read-only instance. Once the creation is successful, you can view the newly added read-only instance on the instance list page of the cluster.
Help and Support
Was this page helpful?
You can also Contact sales or Submit a Ticket for help.
Help us improve! Rate your documentation experience in 5 mins.
Feedback