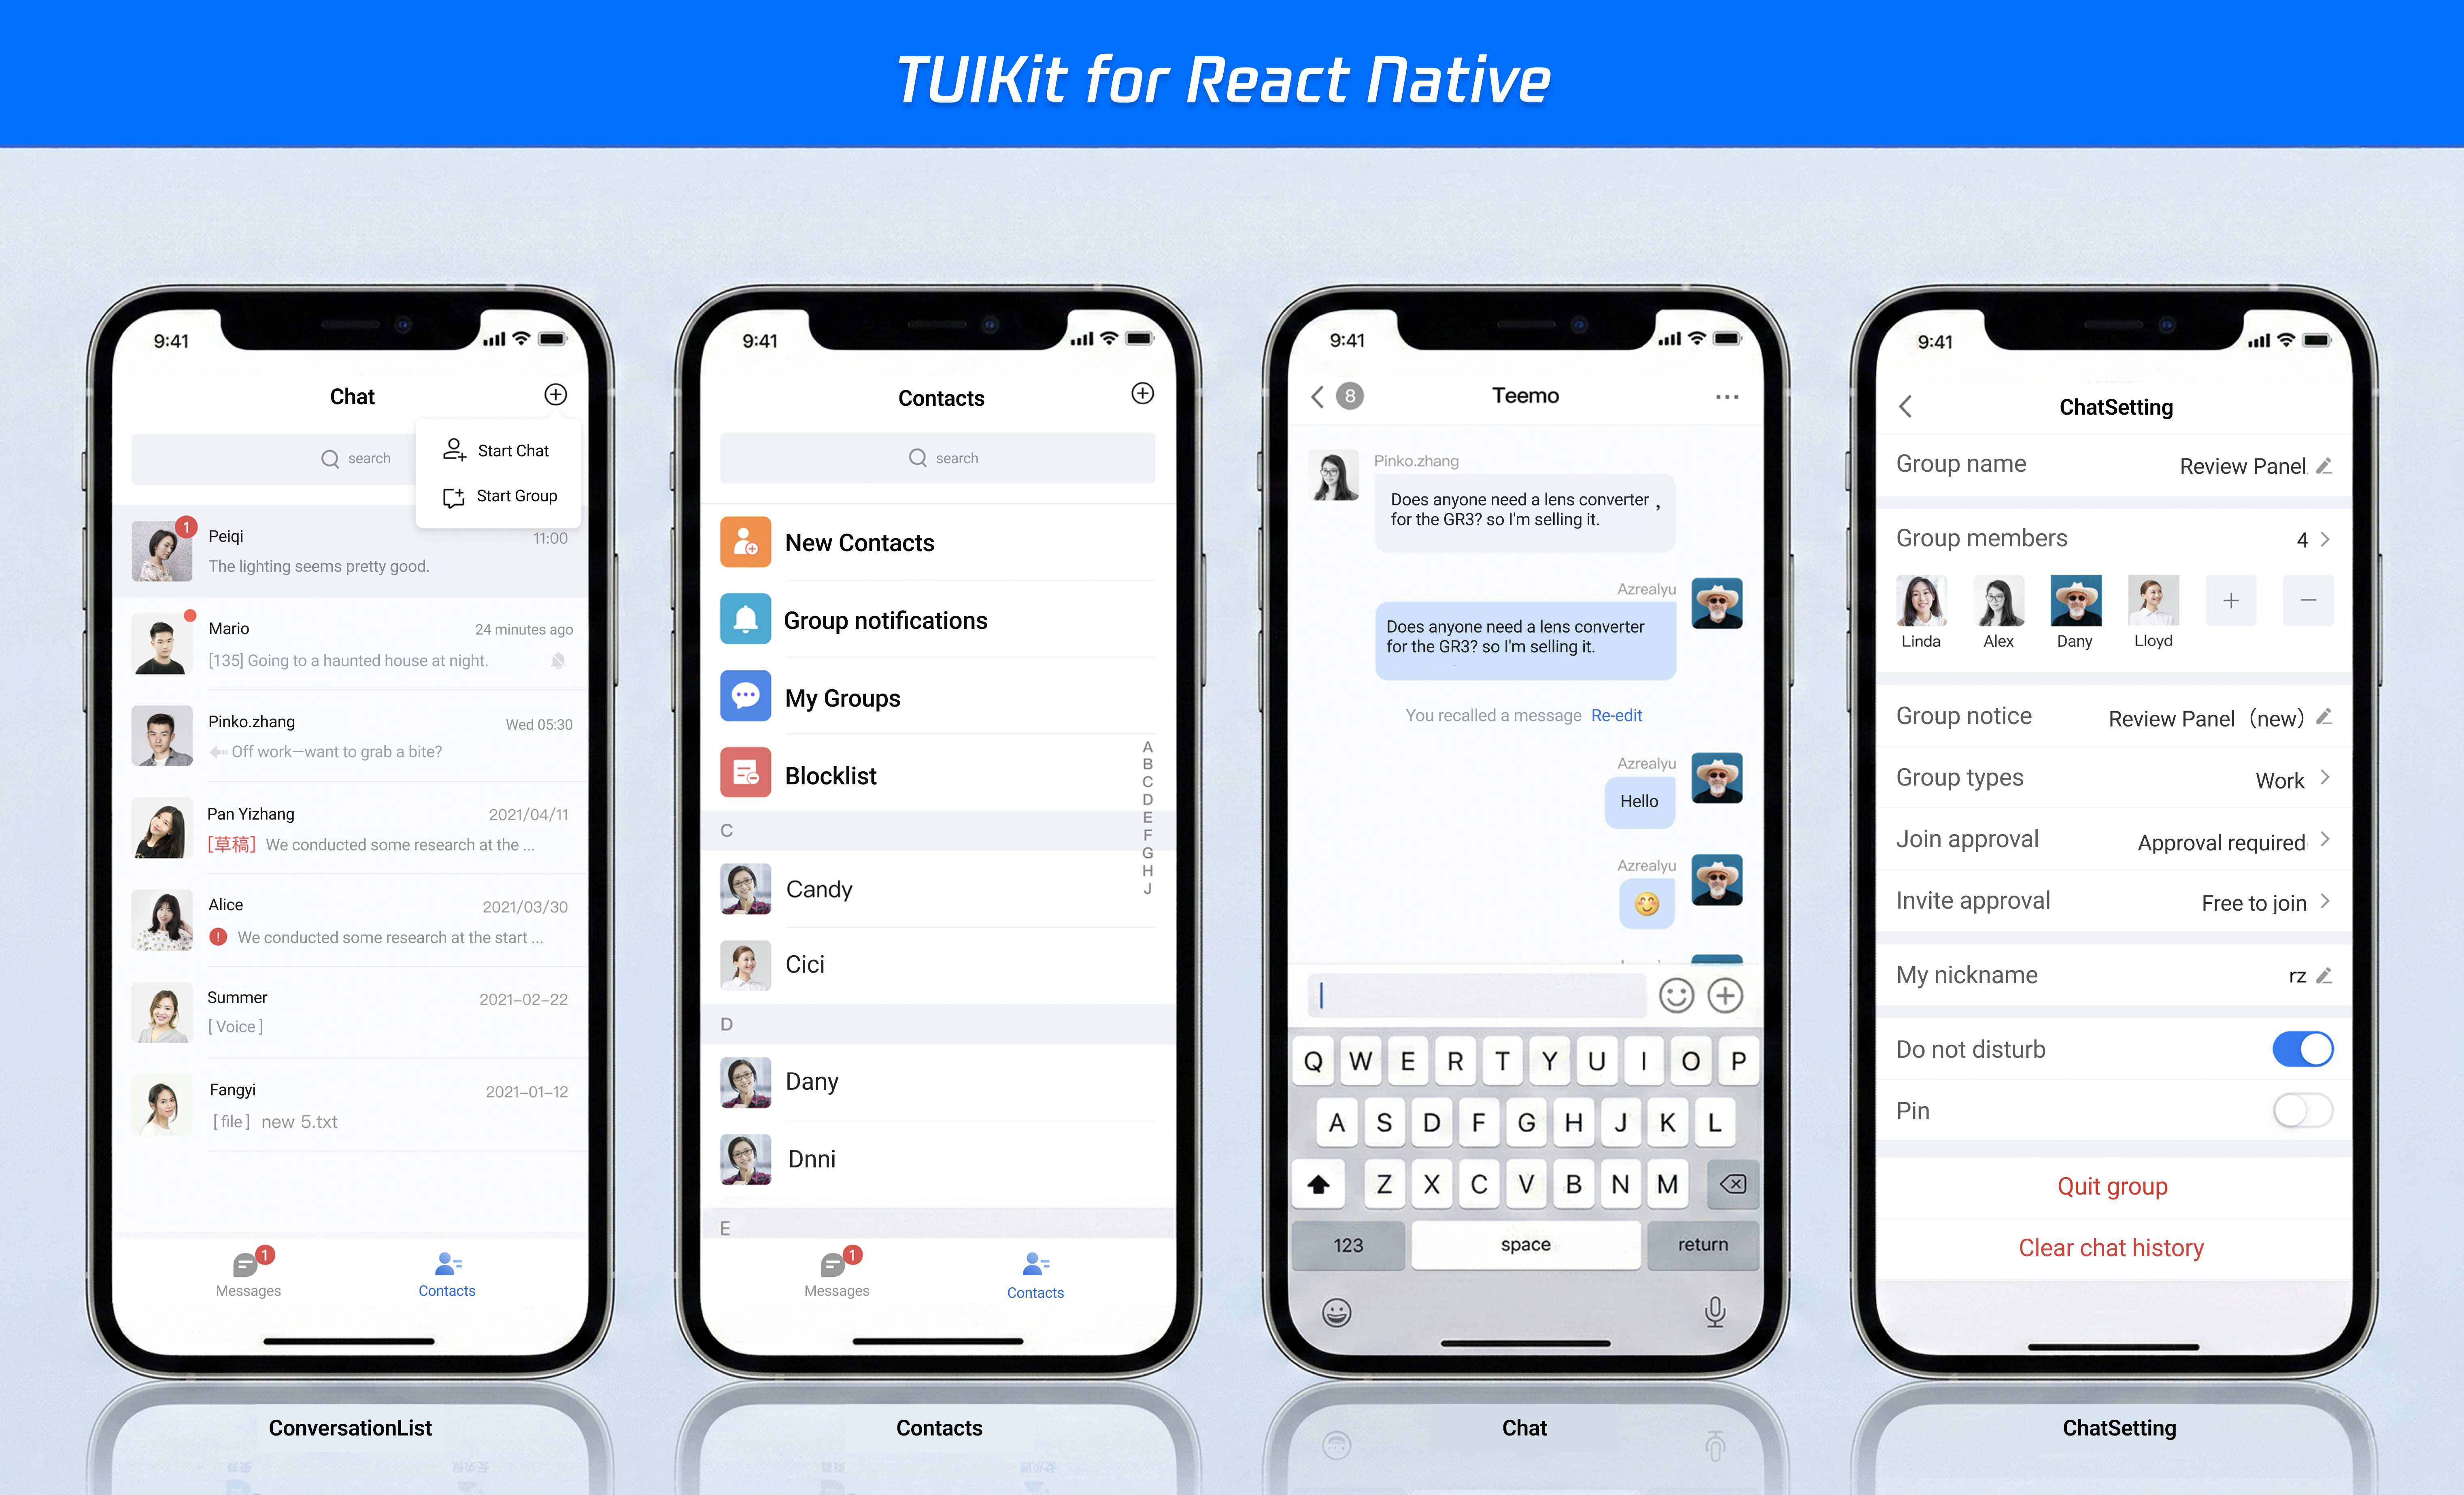
TUIKit is a React Native UI component library based on Tencent Cloud Chat SDK. It provides universal UI components, including conversation, chat, and group features. With these well-designed UI components, you can quickly build elegant, reliable, and scalable chat applications. The UIKit interface developed with React Native is more in line with the usage habits of overseas customers and supports internationalization. If your business needs to expand overseas, you are welcome to integrate it. For details, refer to the open source code.
The interface effect of TUIKit is shown below:
Prerequisites
Step1:Activate the Service
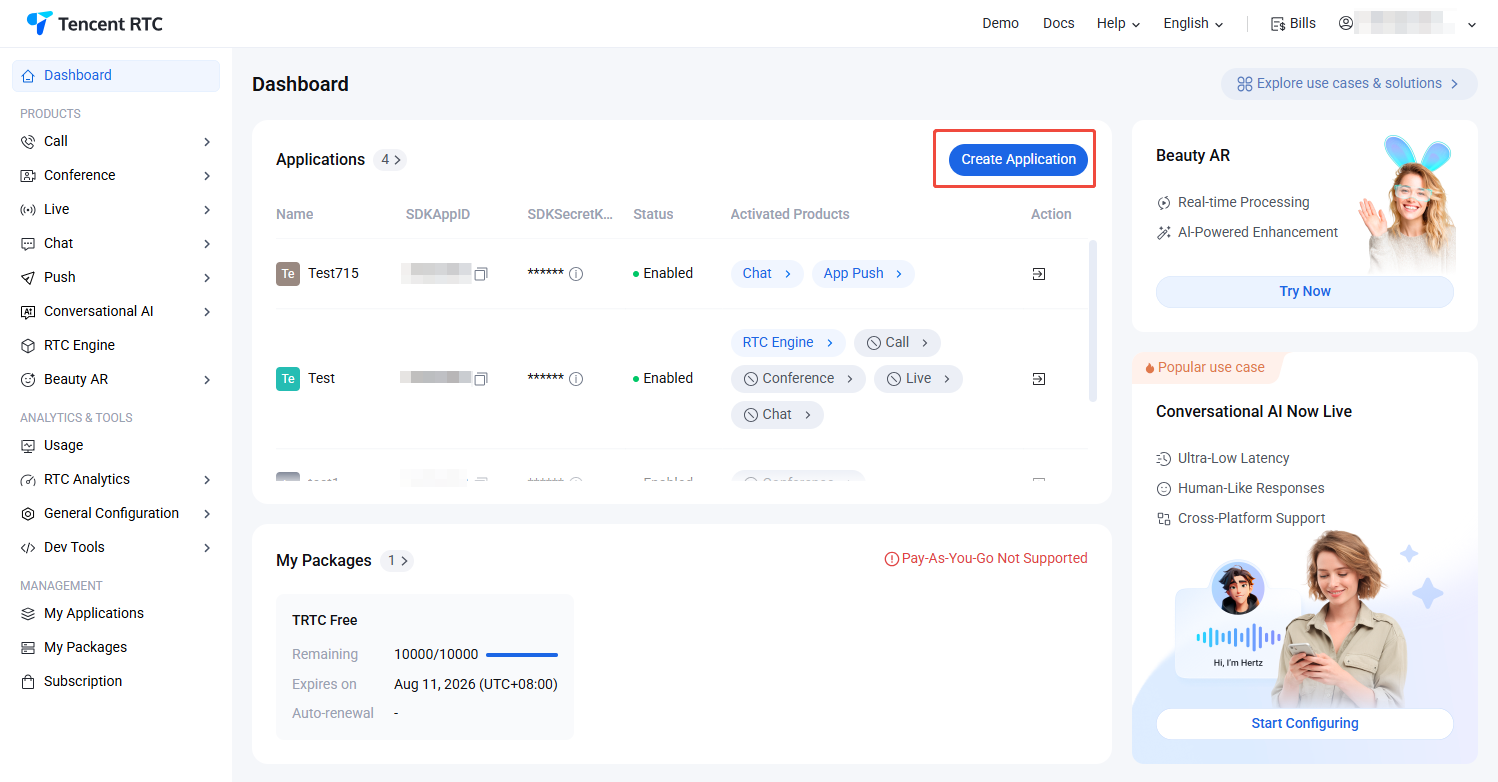
Log in to the Chat console, click Create Application. If you have an existing application, you can omit the application creation process.
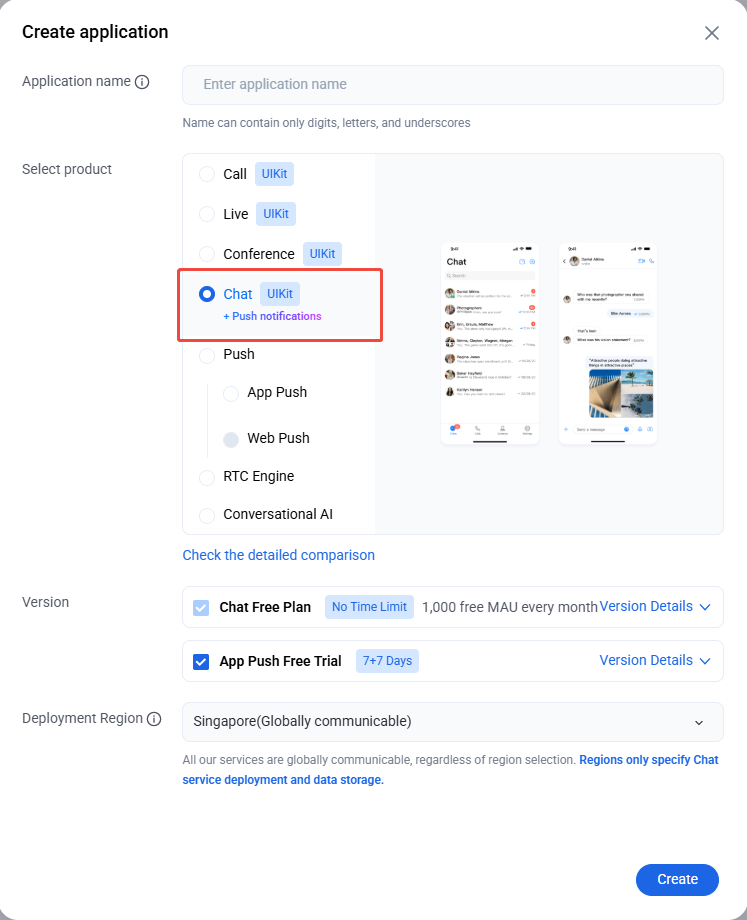
Enter the application name in the create pop-up window and choose Chat, select the appropriate Deployment Region, then click Create.
Step2:Obtain the SDKAppID and SecretKey
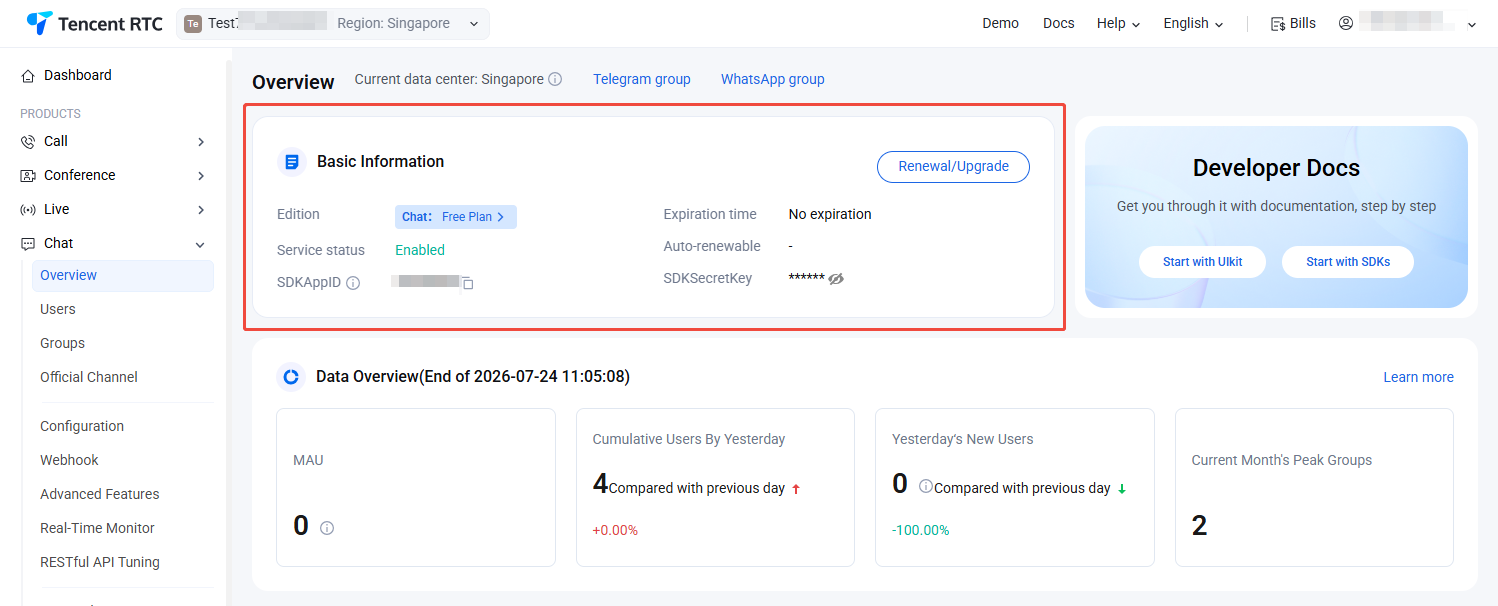
On the Chat Product Details, obtain the SDKAppID and SecretKey information from the SDKAppID column.
Note:
View key info requires identity verification.
Key information is sensitive information. To prevent misappropriation, keep it safe and guard against leakage.
Step3:Create a test account
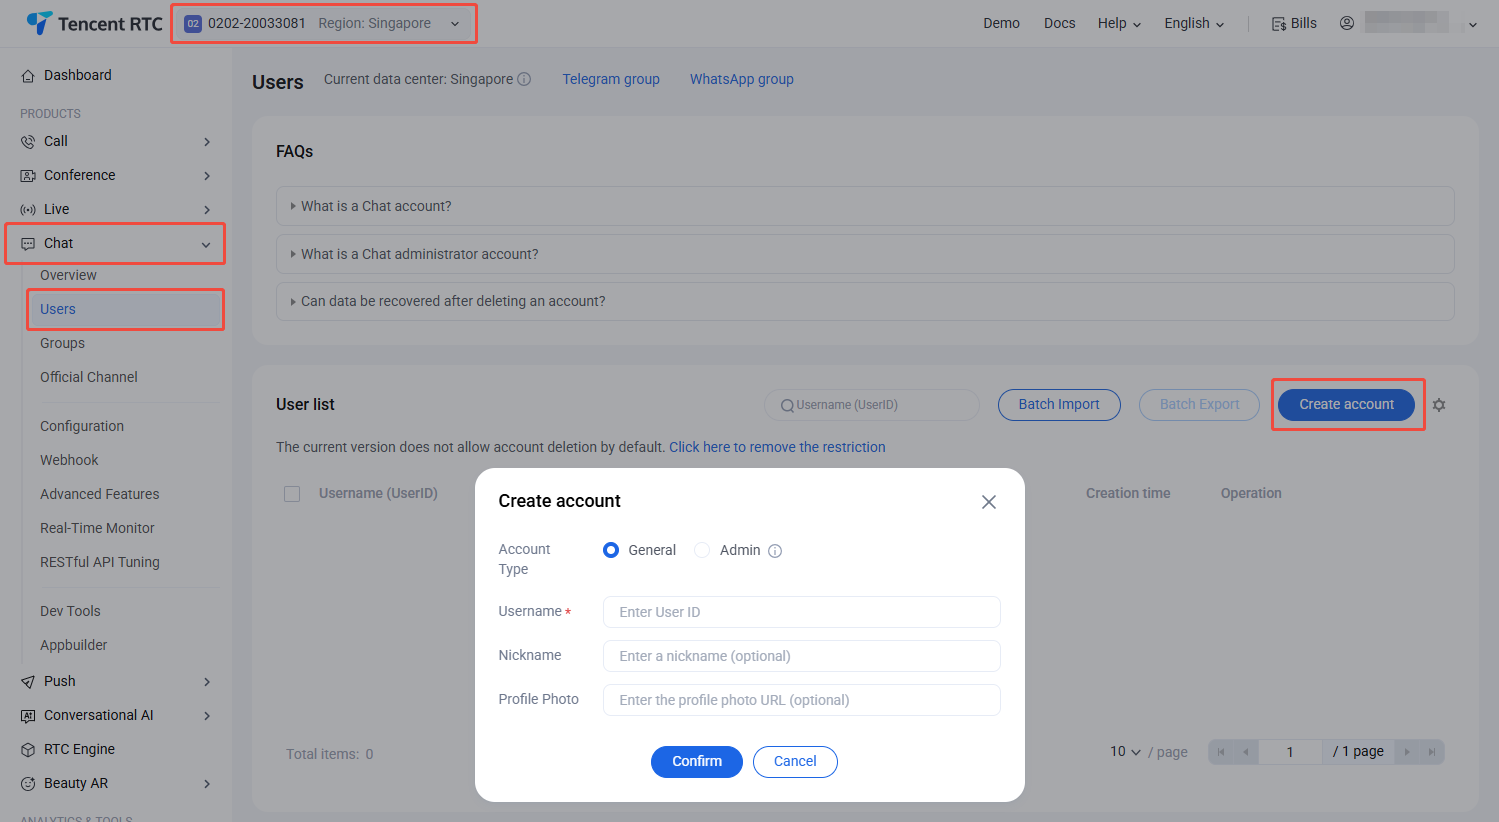
Log in to the Chat > Users, create 2–3 test accounts for experience in C2C chat and group chat capacities.
If you are developing a React Native project for the first time, please refer to the steps on the React Native official website set-up-your-environment to configure your development environment.
If you encounter any environment issues during project creation or compilation, you can run npx react-native doctor for an environmental diagnosis.
Set SDKAPPID and SECRETKEY in the src/screens/LoginScreen.tsx file, which can be obtained from the Chat Console.
const SDKAppID =0;// number
constSECRETKEY='xxx';// string
Run Demo
To compile and run the project, you need to use a real device or an emulator. It is recommended to use a real device. You can refer to the React Native official website running-on-device for connecting a real device for debugging.
Android
iOS
1. Enable Developer Mode on the phone and turn on the USB Debugging switch.
2. Connect the phone with a USB cable, it is recommended to choose the Transferring File option, do not choose the Charge Only option.
3. After confirming the phone is successfully connected, execute npm run android to compile and run the project.
npm run android
1. Connect the phone with a USB cable and open the project ios directory with Xcode.
2. Configure the signing information according to the running-on-device section on the React Native official website.
3. Go to the ios directory and install dependencies.
cd ios
pod install
4. Go back to the root directory and execute npm run ios to compile and run the project.
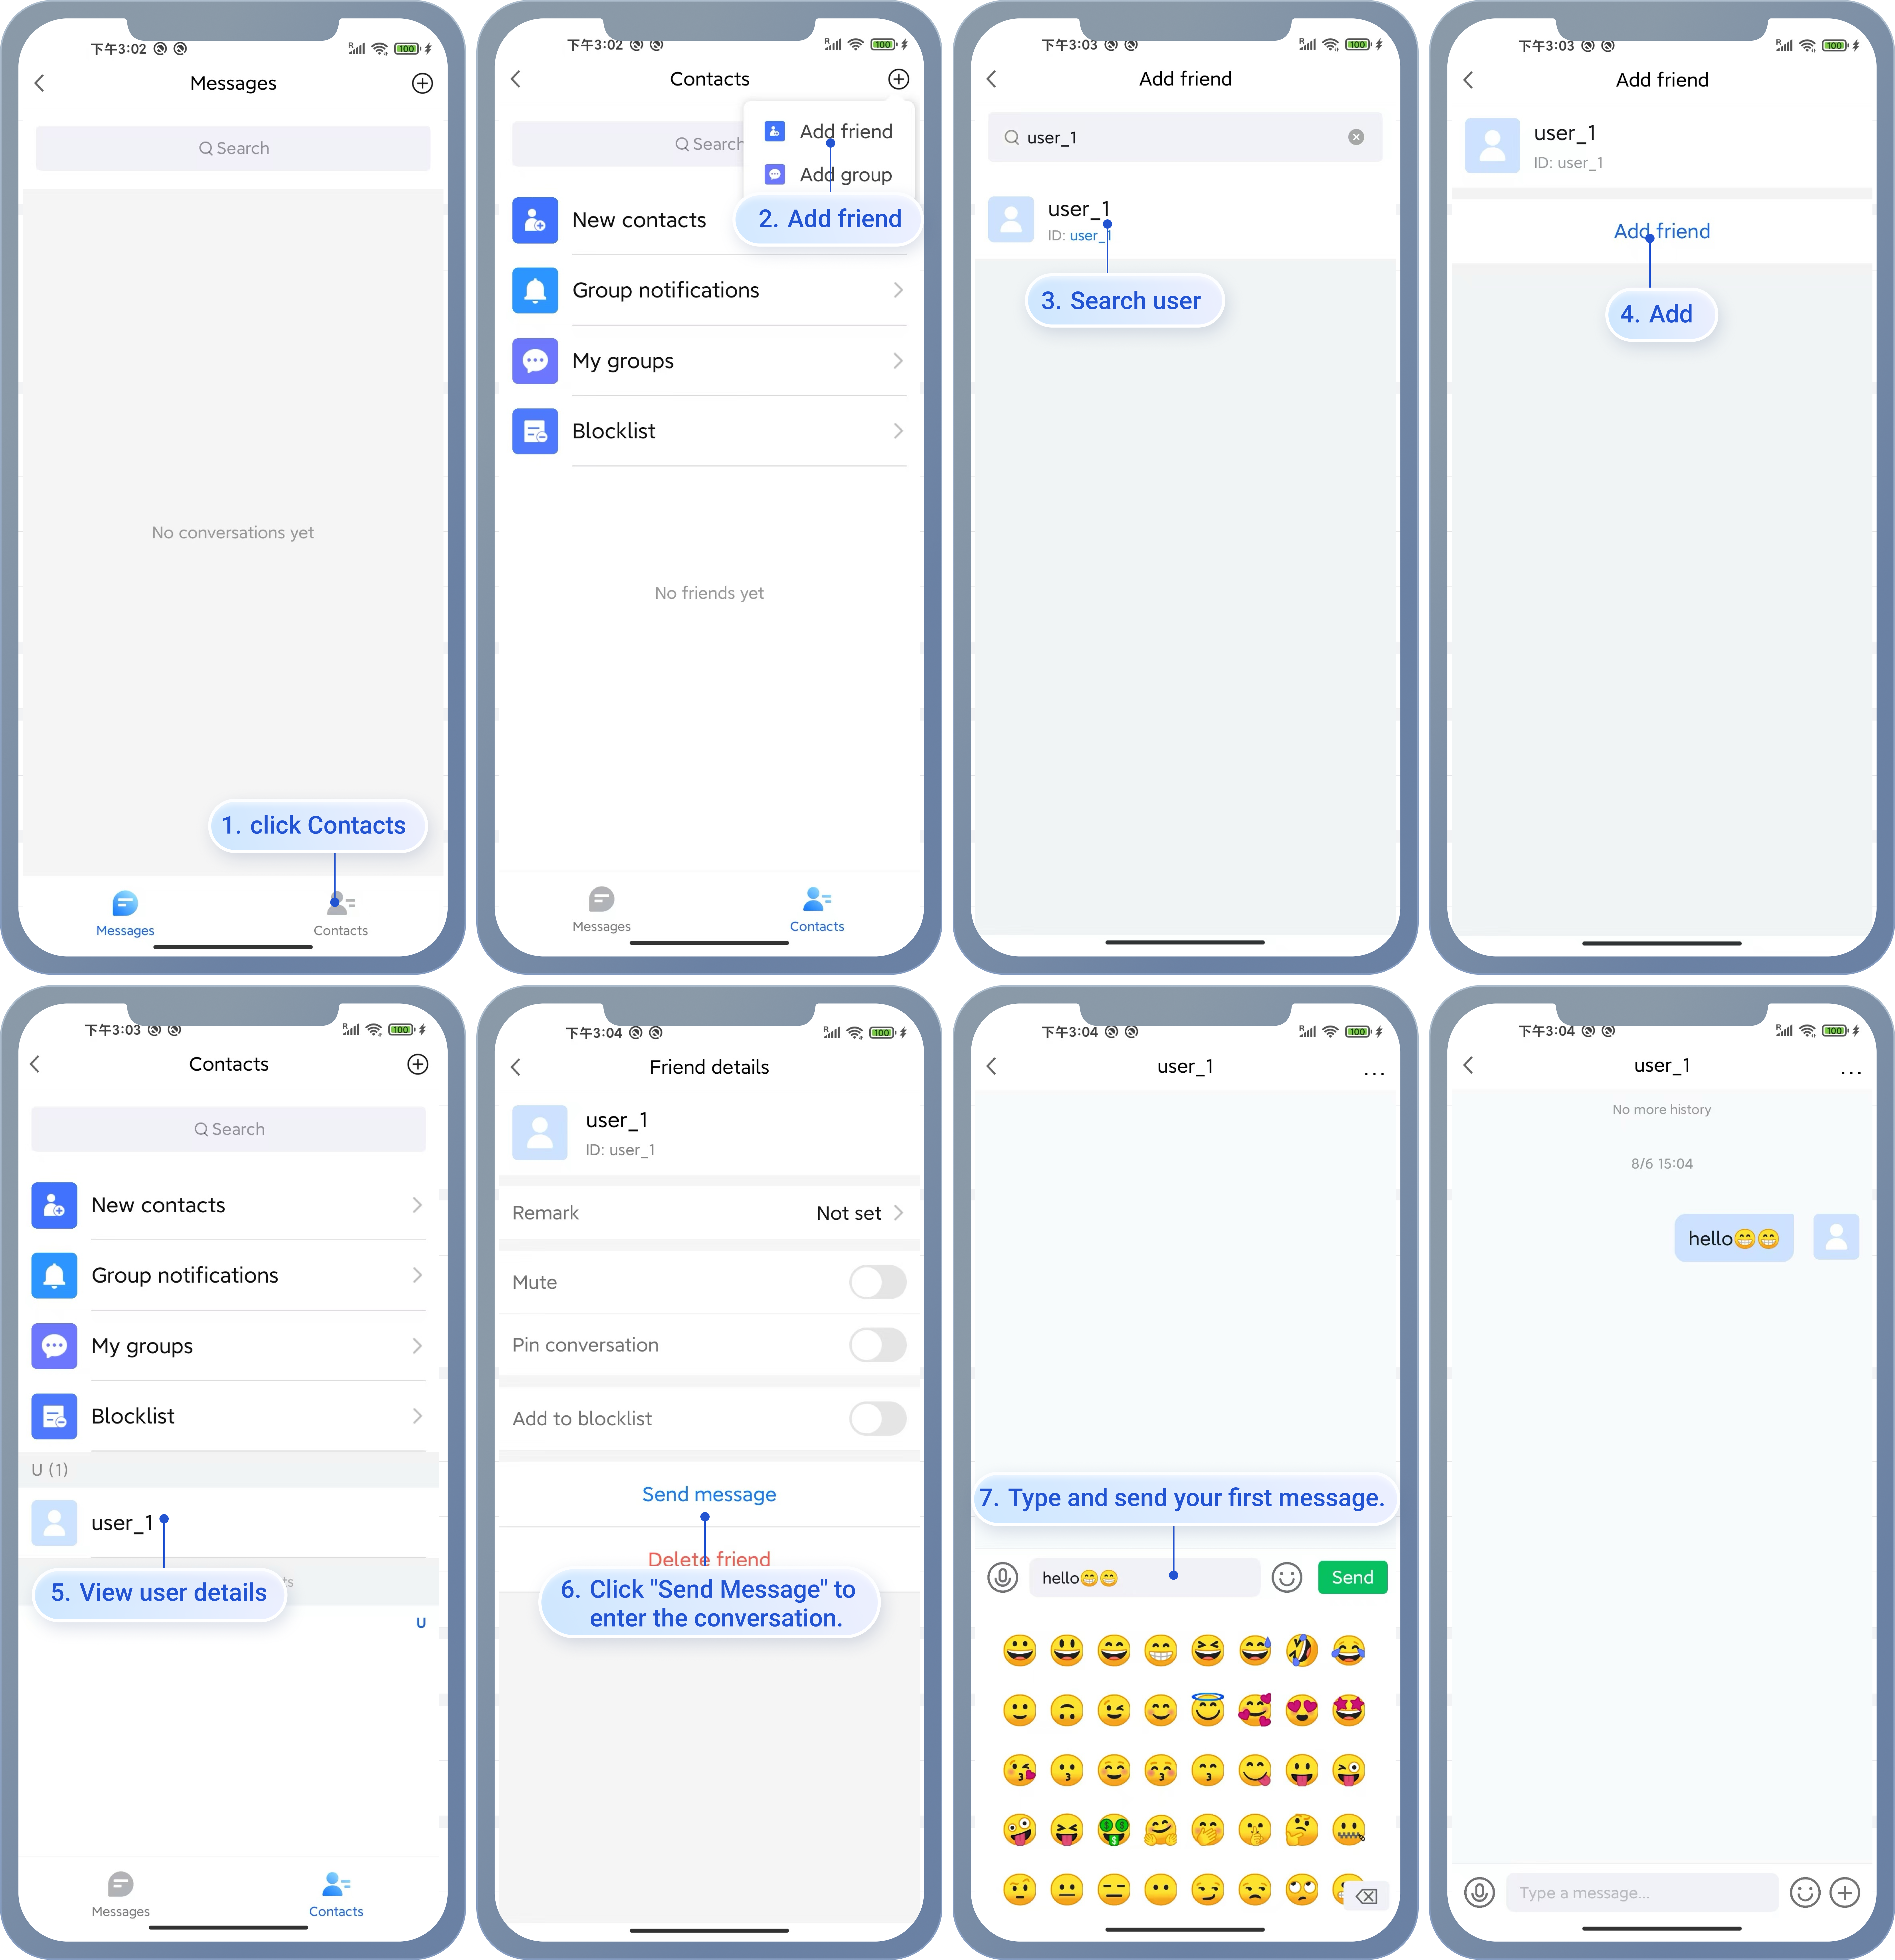
Start a conversation: Tap the friend's information to view their details, then tap "Send Message" to enter the chat interface and send your first message.
FAQ
If you encounter an error as shown in the figure when running npm run android, please reset the environment variables in the project root directory.
exportANDROID_HOME=$HOME/Library/Android/sdk
exportPATH=$PATH:$ANDROID_HOME/emulator
exportPATH=$PATH:$ANDROID_HOME/platform-tools
If you encounter node environment variable issues when executing the Build command in Xcode, please follow these steps: