Multilingual Intelligent Push
다운로드
포커스 모드
폰트 크기
This document provides a step-by-step guide for creating multilingual intelligent message push tasks using the Push Console. This enables you to efficiently reach a global user base, automatically adapt to regional language preferences, and maximize both conversion rates and user experience.
Feature Overview
Multilingual Intelligent Message Push is a premium feature for organizations with global or multilingual audiences. Define a single push task with multiple language variants—the system detects each user's device language and delivers the matching content automatically.
Language variants can be added manually or imported in bulk via the Console, and support Android, iOS, FCM, and other channels. Variants can be saved as reusable templates, and per-language delivery analytics are available.
Note:
Multilingual Intelligent Message Push is available only in the paid edition. Purchase the Push Service (Pro edition) to unlock the single push task with automatic multilingual matching.
Create a Multilingual Intelligent Message Push
1. Log in to the Console, go to Chat > App Push > Create Push, and start a new push task.
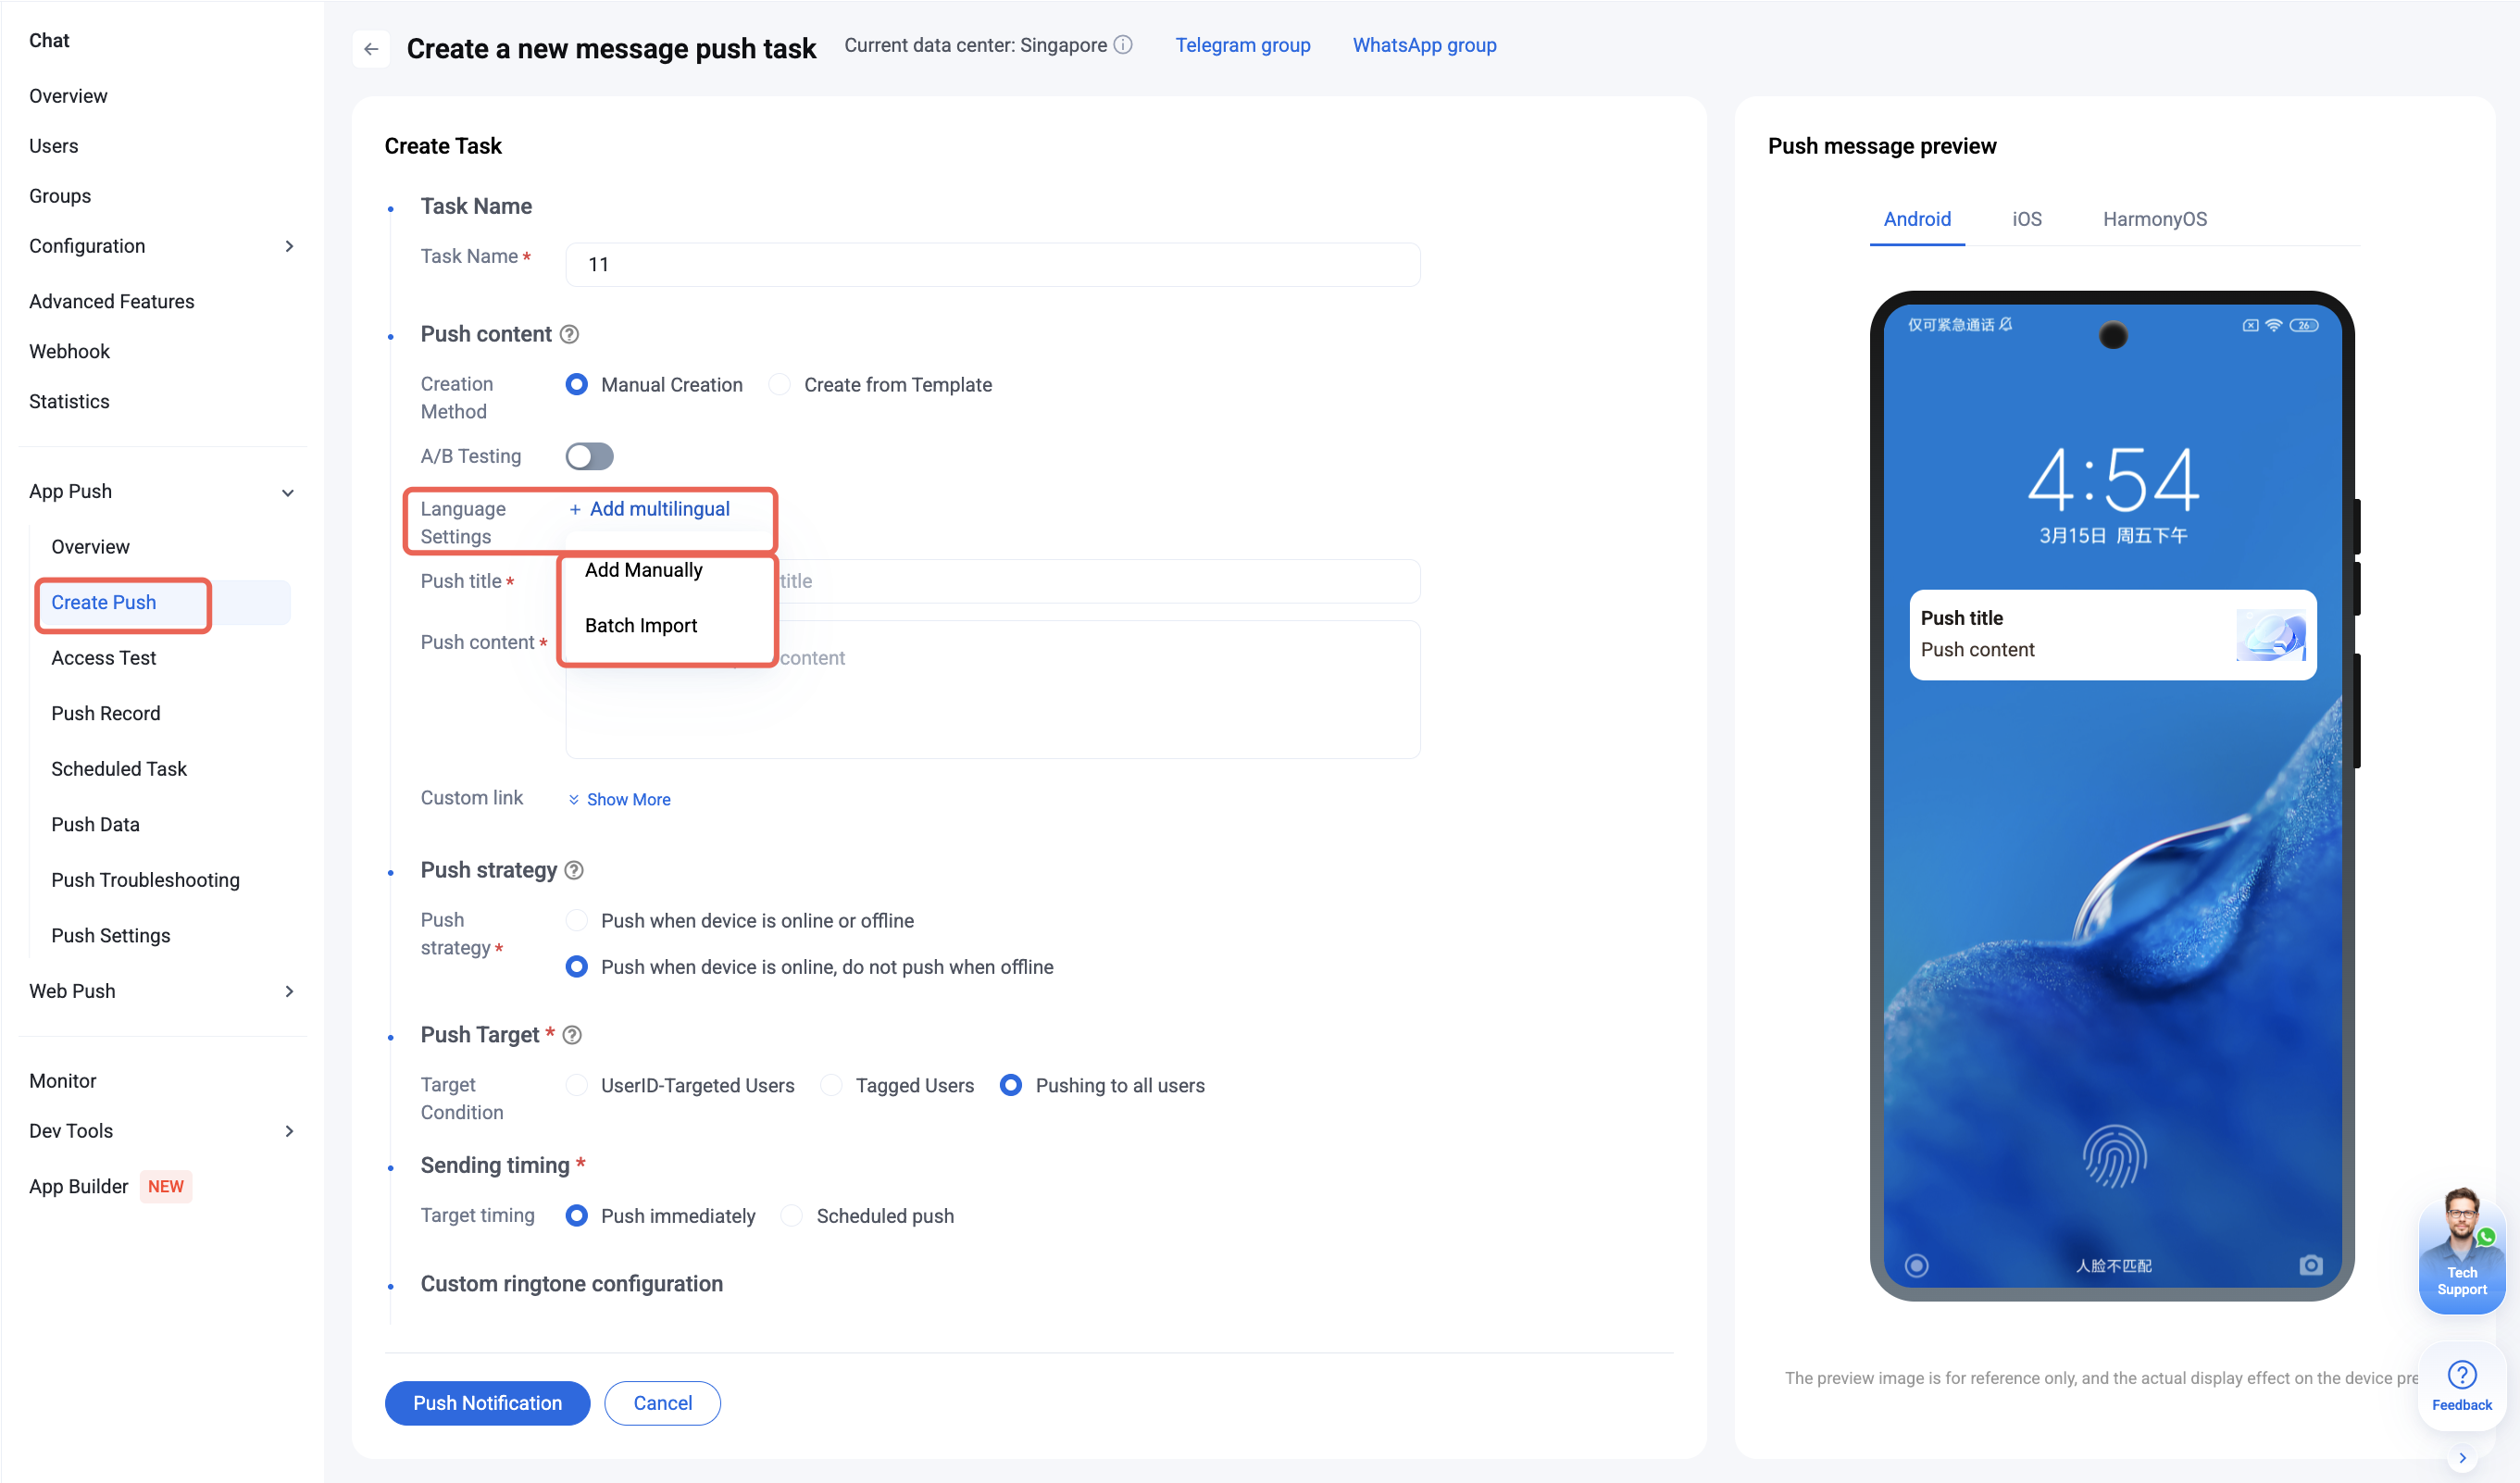
2. In the language settings section, click Add Multilingual, then choose either Add Manually or Batch Import to configure multilingual content.
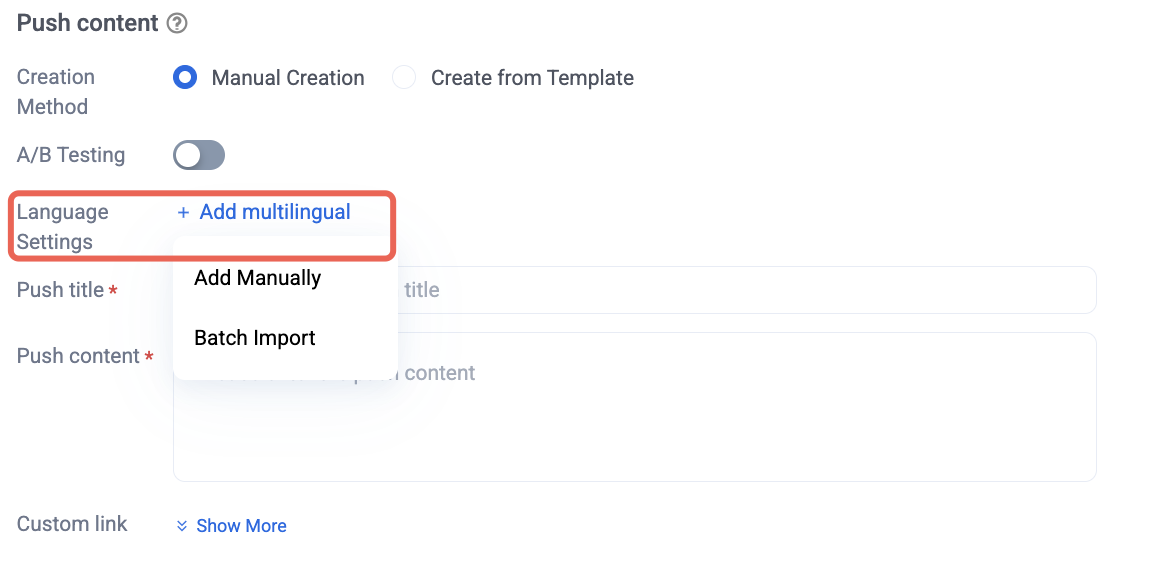
Manually Adding Multilingual Content
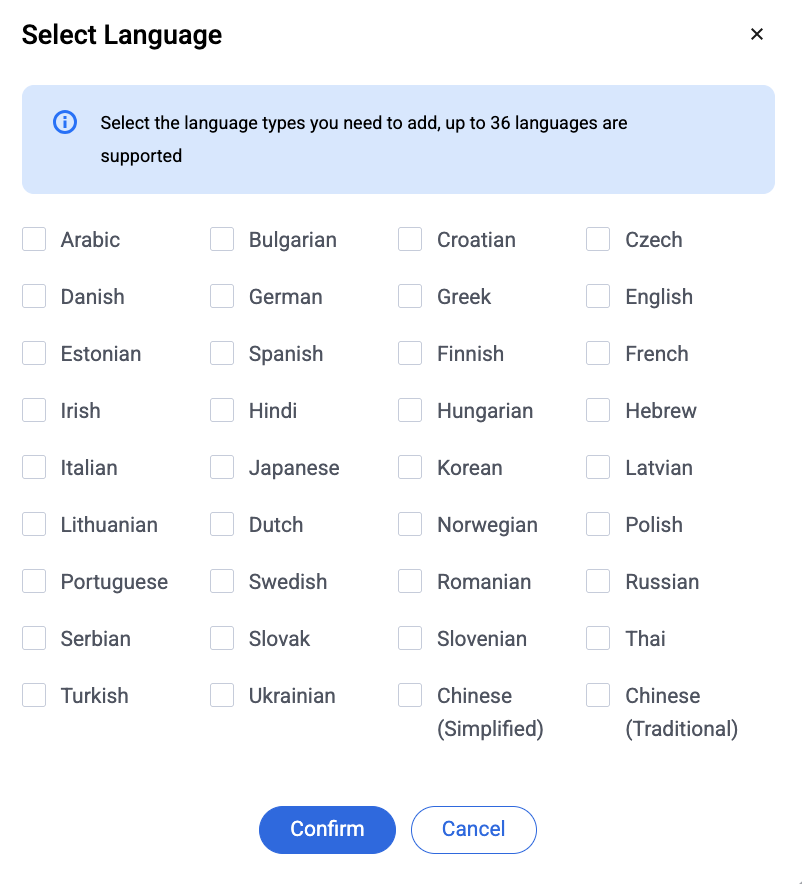
1. After clicking Add Manually, select the languages you want (up to 36 languages), and click Confirm.
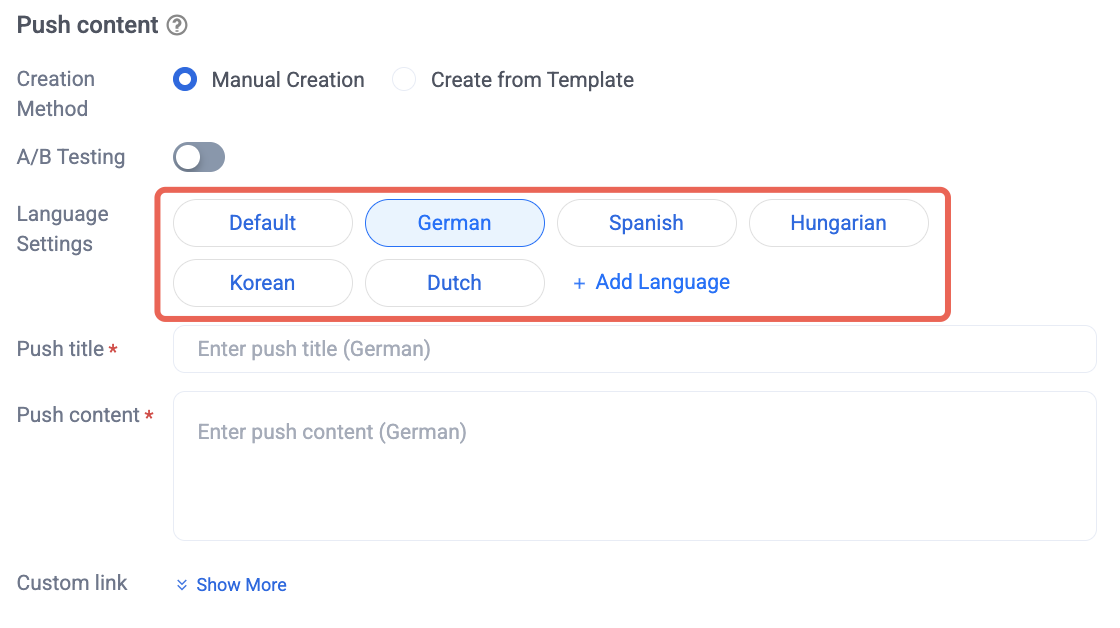
2. For each selected language, enter the corresponding Push Title and Push Content. Ensure the content is natural and appropriate for each language.
Batch Importing Multilingual Content
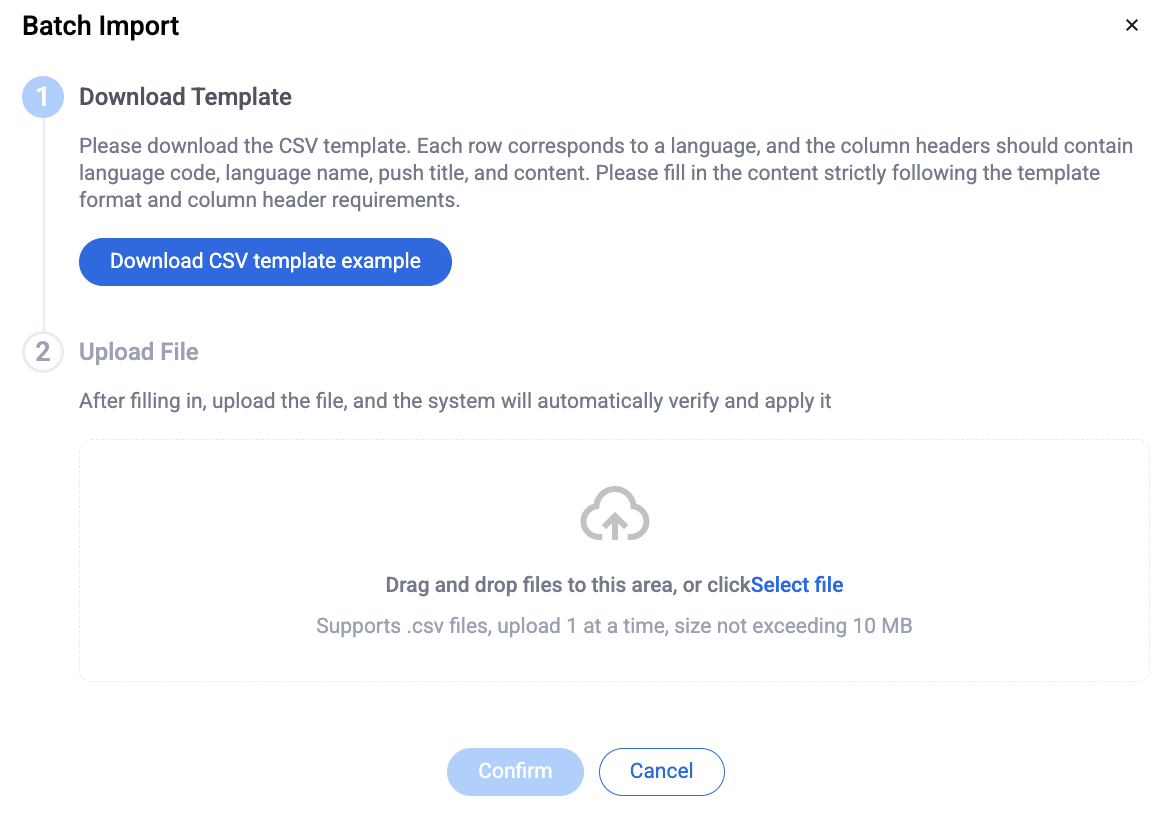
1. Click Batch Import, then select Download CSV Template Example. Each row in the template represents a language, with fixed columns: Language Code, Language Name, Push Title, Push Content.
2. Fill out the CSV template, ensuring all content matches the specified format and column requirements.
3. Once the template is complete, click Upload File. The system will validate the file format and content. When validation succeeds, click Confirm to complete the import.
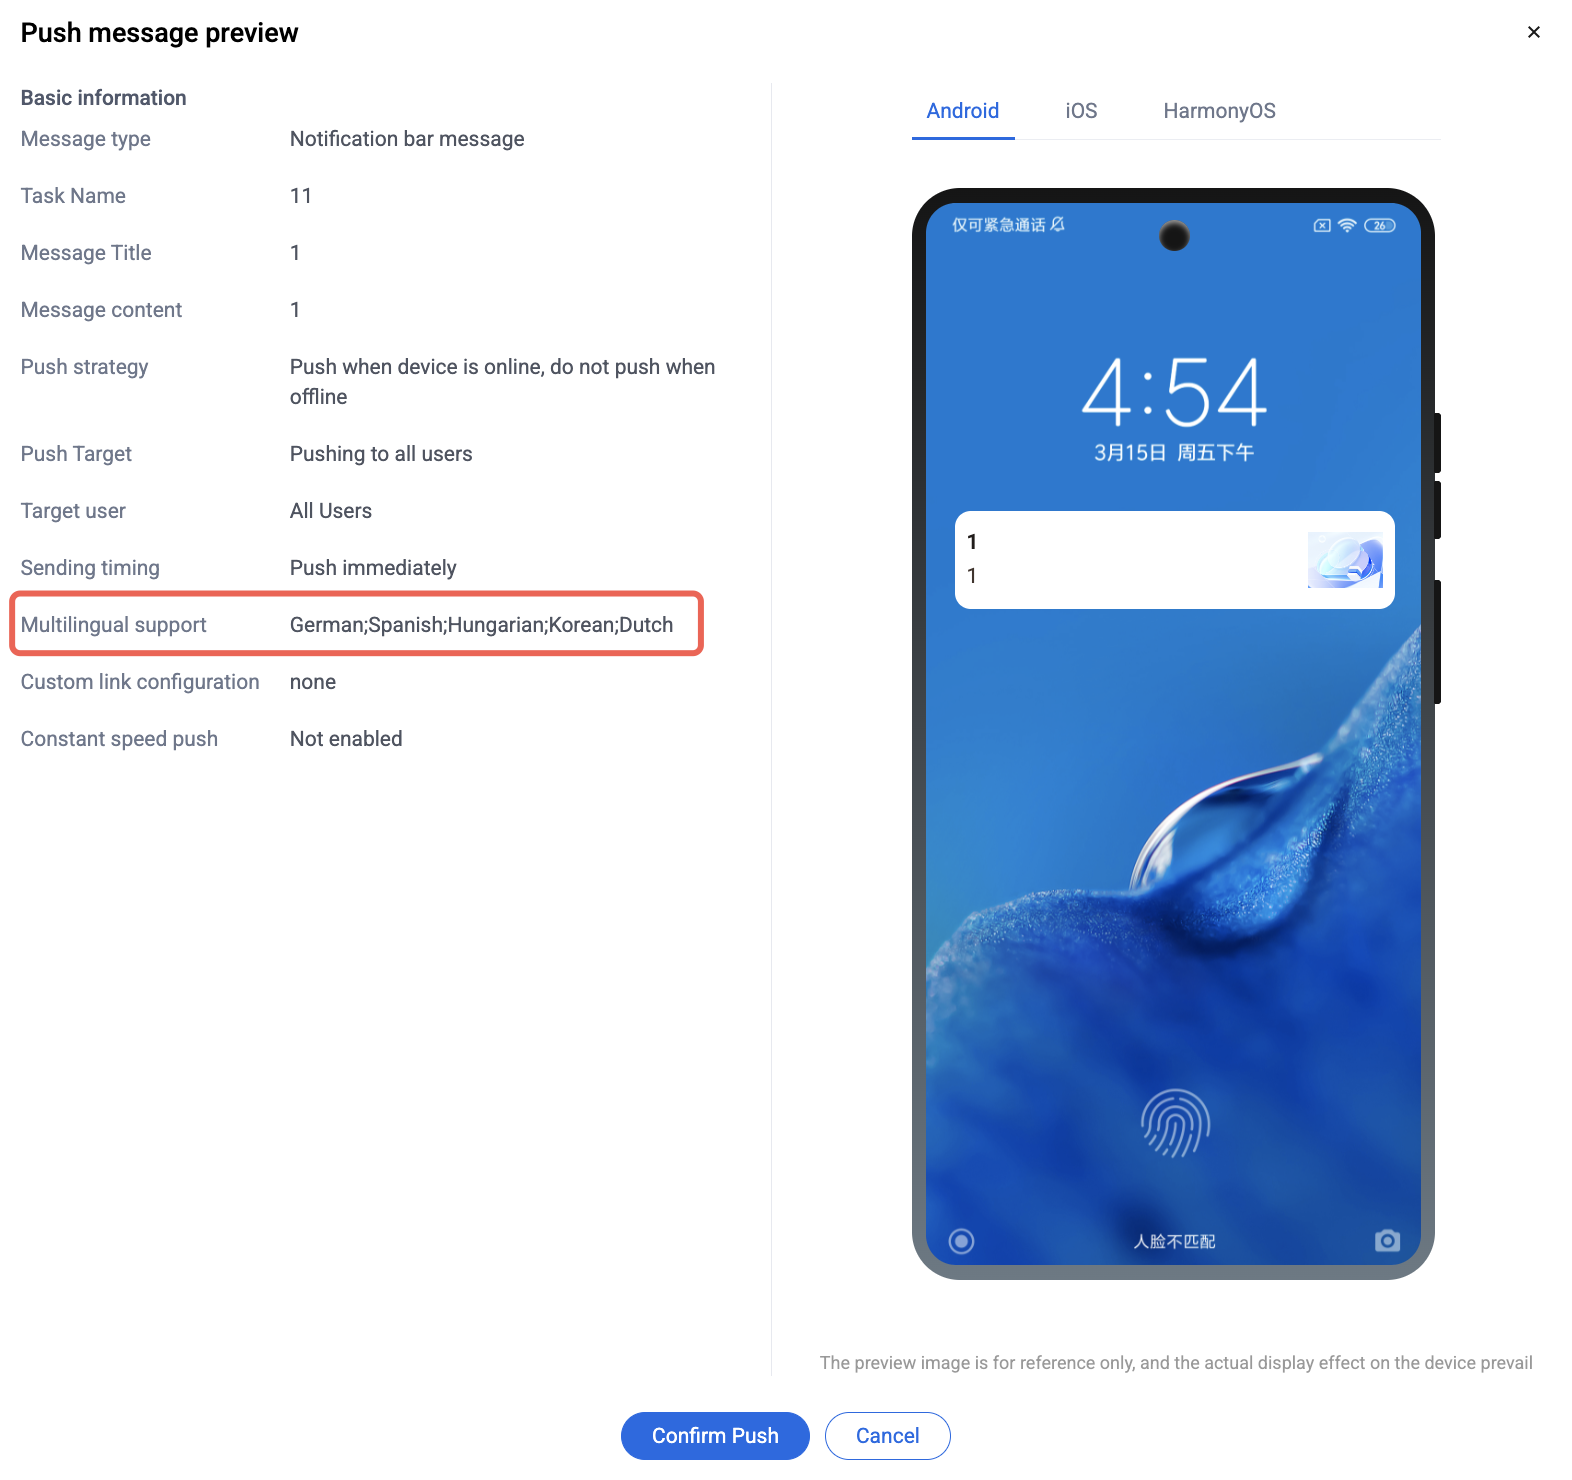
4. After uploading, preview the push message. Verify that all titles and content are correct for each language, then click Confirm Push to send the multilingual intelligent message.
피드백