SSL Encryption Settings
ダウンロード
フォーカスモード
フォントサイズ
SSL Encryption Overview
SSL authentication is a process that authenticates the connection from the client to the cloud database server. It is performed for both users and the server. After you enable SSL encryption, you can obtain a CA certificate and upload it to the server. When the client accesses the database, the SSL protocol will be activated to establish an SSL-based secure channel between the client and the database server to achieve encrypted data transmission. This prevents data interception, tampering, and eavesdropping during transmission and ensures data transmission security for both parties.
The SSL protocol is required to run over a reliable transport layer protocol (such as TCP). SSL is independent of application layer protocols, and high-layer application layer protocols (such as HTTP, FTP, and TELNET) can transparently run over the SSL protocol. The SSL protocol has completed data encryption, communication key negotiation, and server authentication before application layer protocols transmit data. In this way, the data transmitted by application layer protocols is encrypted, which ensures communication privacy.
Background
If encryption is not performed during database access, all data transmitted over the network is in plaintext. As a result, data may be eavesdropped, tampered with, and intercepted by users with malicious purposes. The SSL protocol is designed to address such risks. In theory, it has the following capabilities:
The information is encrypted and cannot be eavesdropped by third parties.
There is a verification mechanism. Once the information is tampered with, both the communicating parties will detect it promptly.
The identity certificate is equipped to prevent identity impersonation.
TDSQL Boundless allows you to enable SSL encryption for an instance in the console and download the CA certificate for the client to establish an SSL connection.
Note:
To ensure the traffic security between the database and the server, SSL encryption does not protect data. You can encrypt network connections at the transport layer to improve communication data security and integrity, but the response time of network connections will increase.
Prerequisites
The instance kernel version is V21.6.1.0 or later.
The instance compatibility mode is MySQL.
Use Limits
Before you use the SSL encryption feature, note the following limitations:
Authentication Mode: Currently, only Server-only TLS is supported. In this mode, the client uses a CA certificate to verify the identity of the database server. Mutual TLS (mTLS) is not supported.
Clone Instance: The SSL encryption configuration of the source instance is not inherited by a new instance created through cloning. If you need to enable SSL encryption, enable it again on the new instance.
Supported TLS Protocol Versions: TDSQL Boundless implements secure connections based on OpenSSL. The supported Transport Layer Security (TLS) protocol versions are listed in the following table.
Protocol Version | Supported or Not |
TLS 1.2 | Supported (Recommended) |
TLS 1.3 | Supported (Recommended) |
TLS 1.0 / TLS 1.1 | No longer recommended. Whether it is available depends on the OpenSSL security policy of the runtime environment. |
Enabling SSL Encryption
1. Log in to the TDSQL Boundless console. In the Instance List, click the Instance ID to go to the Instance Management page.
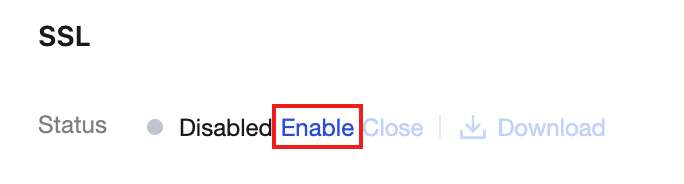
2. Select the Data Security tab and view the current status in the SSL section.
3. This feature is disabled by default. To enable SSL encryption, click Enable to the right of Status, and then click OK in the pop-up window.
Note:
You do not need to restart the instance when you enable or disable SSL. Existing connections are not affected. New connections take effect according to the updated SSL policy.
4. Click Download to save the CA certificate file locally. The certificate is used by the client to verify the identity of the database server and has a validity period of 20 years.
The downloaded certificate file is a compressed package (
TencentDB-TDSQL-B-SSL-CA.zip) and contains the following three files:ca.p7b file: This file is used to import the CA certificate in Windows systems.ca.jks file: This file serves as the truststore and keystore storage file for Java. The password is uniformly set to tencentdb. It is used to import the CA certificate chain in Java programs.ca.pem file: This file is used to import the CA certificate in other systems or applications.Note:
When the instance IP address changes (for example, due to network modifications), the corresponding IP address information in the certificate is automatically updated without requiring manual intervention from the user.
Configuring SSL Certificates
After you enable SSL encryption, you must configure the SSL CA certificate when using a client to connect to the cloud database. After you deploy the downloaded CA certificate to the application server, configure the client to use SSL to connect to the database according to the following example. For other applications or clients, see the corresponding product's user guide.
Note:
Each time SSL encryption is enabled or disabled for TDSQL Boundless, its certificate is regenerated. You must download and load the new certificate file again.
1. Open Navicat.
2. Right-click the target database connection and select Edit Connection.
3. In the connection editing window that pops up, select the SSL tab, select Use Authentication, and then select the path of the downloaded certificate file in the CA Certificate field.
4. Click OK to save the configuration.
5. Double-click the database connection to verify whether it can connect normally.
Note:
If the
connection is being used error occurs, it is usually because an existing session has not been disconnected. Close Navicat and try again.Disabling SSL Encryption
Note:
After you disable SSL encryption, you do not need to restart the instance. The operation takes effect immediately. SSL encryption is no longer used for connections between the client and the database, which reduces the security of link transmission. In addition, clients that use the mandatory SSL mode (for example,
--ssl-mode=REQUIRED) cannot connect. Confirm that this operation has no impact on your business before you proceed.1. Log in to the TDSQL Boundless console and go to the Data Security tab of the target instance.
2. In the SSL section, click Close to the right of Status.
3. In the confirmation window that pops up, click Close after confirming the information.
After the disable operation is completed, the status changes to Disabled.
Connecting to an SSL-Enabled Instance Using the MySQL Command-Line Client
1. Download the SSL CA certificate through the TDSQL Boundless console. For the procedure, see Enable SSL Encryption.
2. Use the MySQL command-line client to connect to the instance with SSL encryption enabled via commands.
When the client database version is MySQL 8.0, use the following command to connect to the instance.
mysql -h <IP address> --ssl-ca=<ca certificate> --ssl-mode=REQUIRED -P <port number> -u <username> -p
If you want to use other SSL modes, such as
VERIFY_CA or VERIFY_IDENTITY, use the following command to connect to the instance.mysql -h <IP address> --ssl-ca=<ca certificate> --ssl-mode=VERIFY_CA -P <port number> -u <username> -p
Note:
The
--ssl-mode parameter specifies the SSL mode. Typically, the REQUIRED and VERIFY_CA modes are recommended. These modes require the MySQL client to connect to the MySQL server using the SSL/TLS protocol and to verify the server's SSL/TLS certificate. The VERIFY_IDENTITY mode, in addition to requiring verification of the server's SSL/TLS certificate, also requires the hostname used by the client to match the identifier in the server certificate. Otherwise, the MySQL client will refuse to connect to the MySQL server.3. Enter the password for the corresponding username as prompted by the system.
Code Examples for Connecting to SSL-Enabled Instances Using Common Programs
PHP
$conn = mysqli_init();mysqli_ssl_set($conn, NULL, NULL, "<path to the downloaded certificate>", NULL, NULL);mysqli_real_connect($conn, '<database access address>', '<database access username>', '<database access password>', '<specified database to access>', <access port>, MYSQLI_CLIENT_SSL | MYSQLI_CLIENT_SSL_DONT_VERIFY_SERVER_CERT);if (mysqli_connect_errno($conn)) {die('Failed to connect to MySQL: '.mysqli_connect_error());}
PHP (Using PDO)
$options = array(PDO::MYSQL_ATTR_SSL_CA => '<path to the downloaded certificate>');$db = new PDO('mysql:host=<database access address>;port=<access port>;dbname=<specified database to access>', '<database access username>', '<database access password>', $options);
Java (MySQL Connector for Java)
# generate truststore and keystore in codeString importCert = " -import "+" -alias mysqlServerCACert "+" -file " + ssl_ca +" -keystore truststore "+" -trustcacerts " +" -storepass password -noprompt ";String genKey = " -genkey -keyalg rsa " +" -alias mysqlClientCertificate -keystore keystore " +" -storepass password123 -keypass password " +" -dname CN=MS ";sun.security.tools.keytool.Main.main(importCert.trim().split("\\\\s+"));sun.security.tools.keytool.Main.main(genKey.trim().split("\\\\s+"));# use the generated keystore and truststoreSystem.setProperty("javax.net.ssl.keyStore", "<path to the downloaded certificate>");System.setProperty("javax.net.ssl.keyStorePassword","tencentdb");System.setProperty("javax.net.ssl.trustStore", "<path to the downloaded certificate>");System.setProperty("javax.net.ssl.trustStorePassword","tencentdb");url = String.format("jdbc:mysql://%s/%s?serverTimezone=UTC&useSSL=true", '<database access address>', '<specified database to access>');properties.setProperty("user", '<database access username>');properties.setProperty("password", '<database access password>');conn = DriverManager.getConnection(url, properties);
.NET (MySqlConnector)
var builder = new MySqlConnectionStringBuilder{Server = "<database access address>",UserID = "<database access username>",Password = "<database access password>",Database = "<specified database to access>",SslMode = MySqlSslMode.VerifyCA,SslCa = "<downloaded certificate>",};using (var connection = new MySqlConnection(builder.ConnectionString)){connection.Open();}
Python (MySQLConnector Python)
try:conn = mysql.connector.connect(user='<database access username>',password='<database access password>',database='<specified database to access>',host='<database access address>',ssl_ca='<path to the downloaded certificate>')except mysql.connector.Error as err:print(err)
Python (PyMySQL)
conn = pymysql.connect(user='<database access username>',password='<database access password>',database='<specified database to access>',host='<database access address>',ssl={'ca': '<path to the downloaded certificate>'})
Django (PyMySQL)
DATABASES = {'default': {'ENGINE': 'django.db.backends.mysql','NAME': '<specified database to access>','USER': '<database access username>','PASSWORD': '<database access password>','HOST': '<database access address>','PORT': '<access port>','OPTIONS': {'ssl': {'ca': '<path to the downloaded certificate>'}}}}
Node.js
var fs = require('fs');var mysql = require('mysql');const serverCa = [fs.readFileSync("<path to the downloaded certificate>", "utf8")];var conn=mysql.createConnection({host:"<database access address>",user:"<database access username>",password:"<database access password>",database:"<specified database to access>",port:<access port>,ssl: {rejectUnauthorized: true,ca: serverCa}});conn.connect(function(err) {if (err) throw err;});
Golang
rootCertPool := x509.NewCertPool()pem, _ := ioutil.ReadFile("<path to the downloaded certificate>")if ok := rootCertPool.AppendCertsFromPEM(pem); !ok {log.Fatal("Failed to append PEM.")}mysql.RegisterTLSConfig("custom", &tls.Config{RootCAs: rootCertPool})var connectionString stringconnectionString = fmt.Sprintf("%s:%s@tcp(%s:<access port>)/%s?allowNativePasswords=true&tls=custom","<database access username>" , "<database access password>", "<database access address>", '<specified database to access>')db, _ := sql.Open("mysql", connectionString)
Ruby
client = Mysql2::Client.new(:host => '<database access address>',:username => '<database access username>',:password => '<database access password>',:database => '<specified database to access>',:sslca => '<path to the downloaded certificate>')
フィードバック