This document explains how to use OBS Studio to stream external media sources into a LiveKit live room. This solution is ideal for scenarios such as game streaming, esports commentary, or broadcasting local video files.
Note:
The Live OBS streaming feature has been fully upgraded. To use this functionality, you must activate a Live Monthly Package — Free Trial, Standard, or Pro Version. For optimal streaming performance and reduced latency, we recommend contacting Technical Support for OBS-specific configuration optimization before going live.
Obtain OBS Stream URL
Live offers two methods for obtaining the OBS stream URL to fit different development requirements.
Method 1: Live Management System
This method is recommended for most production environments and development testing. Managing streams via a visual interface reduces maintenance overhead and enables rapid deployment.
Steps
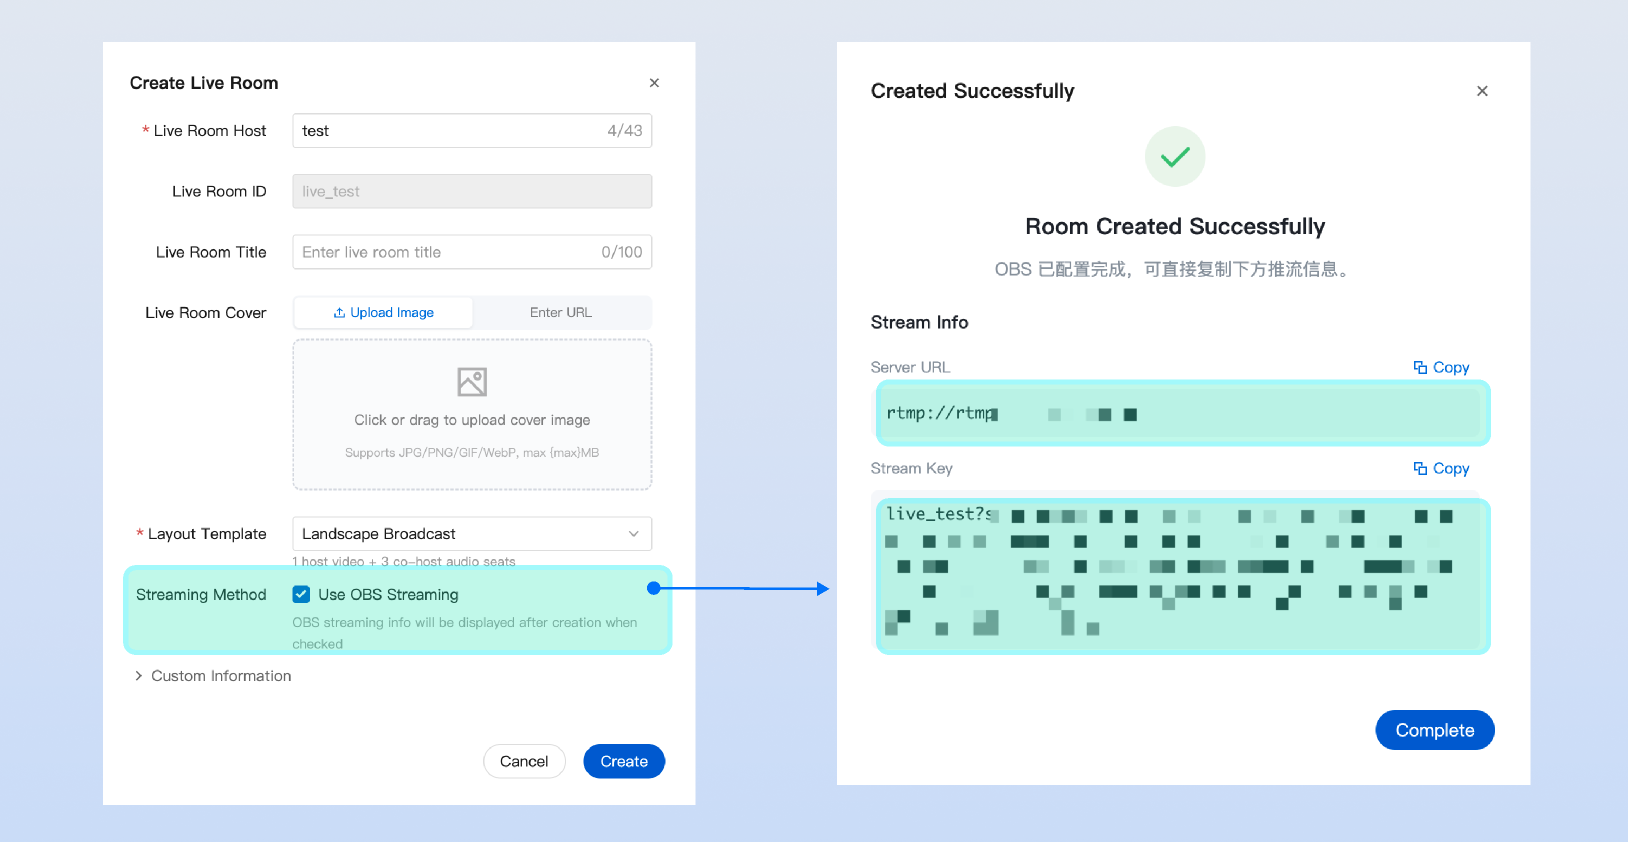
Open the Live Management System (Vue3), create a new live room, and select "Use OBS Streaming" under Streaming Method. After the room is created, the Server URL and Stream Key will be displayed automatically.
Method 2: Server APIs Integration
This method is suitable for highly customized live streaming scenarios where you want to implement a fully closed-loop workflow within your own system.
Once you have the stream URL, configure OBS Studio as follows.
Step 1: Set Server Information
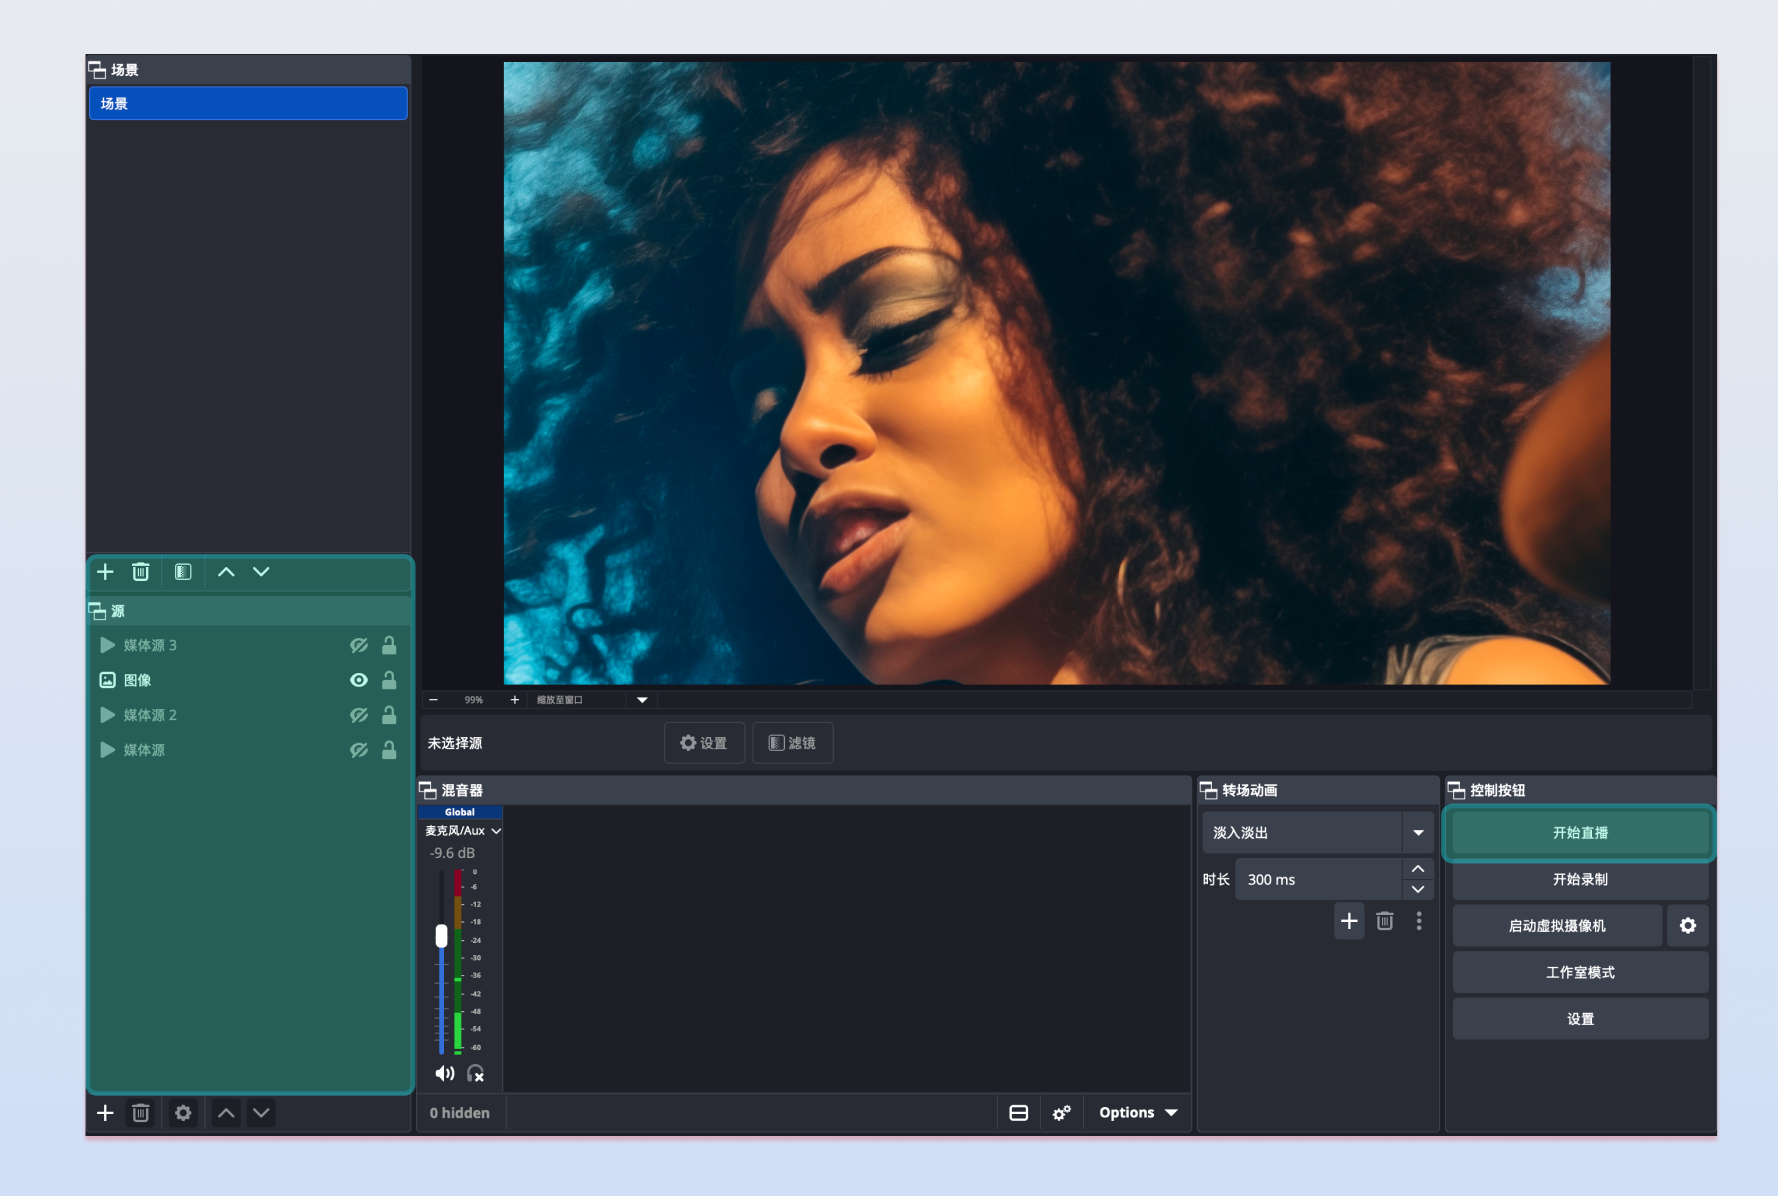
Click the Controls button in the bottom toolbar, then select Settings to open the settings panel.
Go to Stream to configure server details.
Service: Choose Custom.
Server and Stream Key: Use the values obtained from the Obtain OBS Stream URL section.
Step 2: Optimize Parameter Configuration
To deliver a low-latency, high-definition experience for your audience, adjust the following settings.
1. Configure Video Parameters
Navigate to Settings > Video. Refer to the configurations below. For game streaming, increasing the frame rate to 30 fps is recommended for smoother visuals:
Resolution
Frame Rate (fps)
Recommended Bitrate
1920x1080
24 fps
3000 kbps
1280x720
24 fps
2500 kbps
2. Configure Output Parameters
Go to Settings > Output and set Output Mode to Advanced. The RTMP backend does not support B-frame transmission. Adjust the parameters as follows:
Parameter
Recommended Value
Description
Encoder
x264 or NVIDIA NVENC
Hardware encoding is preferred to reduce CPU usage.
Keyframe Interval
1 or 2
Do NOT set to 0; otherwise, stream pulling will be extremely slow.
CPU Usage Preset
ultrafast
Minimizes encoding time and reduces stuttering.
Profile
baseline
Removes B-frames for RTMP backend compatibility.
Tune
zerolatency
Optimized for live streaming, significantly reduces latency.
x264 Options
threads=1
Limits encoding threads to improve stream stability.
Step 3: Configure Advanced Options
Go to Settings > Advanced to ensure quick recovery during network fluctuations.
1. Stream Delay: Set to Disabled. Enabling this will greatly increase latency.
2. Auto-Reconnect: Enable this option.
Retry Delay: Set to 2 seconds.
Maximum Retries: Set to 20.
Start OBS Live Streaming
Start Streaming
Add a "Window Capture" or "Video Capture Device" source in the OBS Sources panel. After previewing and confirming your setup, click Start Streaming.
End Streaming
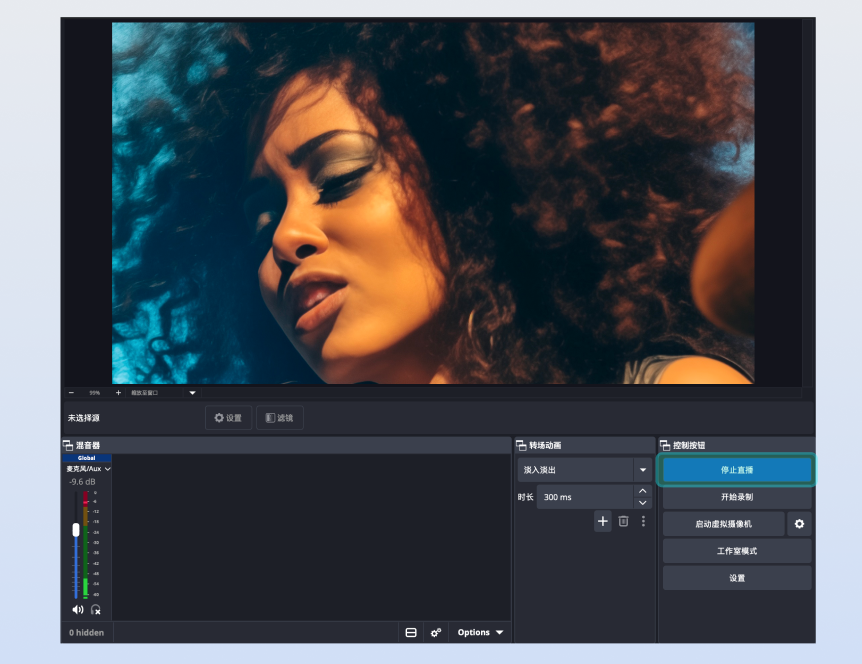
Step 1: Stop OBS Streaming
In the main OBS Studio window, click Stop Streaming in the lower right corner.
Step 2: Close the Live Room
To promptly release room resources and stop billing, follow the operation based on your method of Obtain OBS Stream URL:
Live Management Console: On the Live Stream List page in the console, select the live room and click End Live.
Server APIs Integration: Call the server RESTful API to Dismiss Room.
FAQs
Will audience playback automatically recover if the host uses OBS third-party tools for RTMP streaming and network fluctuations cause a stream interruption?
LiveKit has upgraded its media scheduling solution, providing enhanced protection for stream interruption scenarios. Please contact Technical Support for OBS-specific configuration optimization before going live:
Auto-Recovery Mechanism: If network fluctuations cause a brief stream interruption, the system automatically maintains the mixed stream channel. As long as the host resumes streaming within the specified time window, the audience will seamlessly reconnect—no backend API calls required.
Enhanced Stability: The new solution extends the mixed stream node's waiting threshold, resolving previous issues where interruptions longer than 2 minutes caused mixed stream breaks and prolonged black screens for viewers.
Listening for OBS Start Streaming and End Streaming Events
When OBS starts streaming, it enters the TRTC room and triggers the TRTC Enter Room callback event.
When OBS stops streaming, it leaves the TRTC room and triggers the TRTC Exit Room callback event.
Monitor Server Room Callbacks to detect OBS streaming and interruption events. Use a consistent format for the bot's UserID. When your backend receives Enter Room and Exit Room callbacks, verify if the event relates to the bot before processing your business logic.