IP groups provide centralized management of IP addresses and CIDR blocks and can be referenced by Anti-DDoS and Web protection rules. This helps reduce repetitive configuration and improves the efficiency of policy management.
Note:
IP groups support cross-site references. An IP group created for one site can be referenced by protection rules of other sites to maintain consistent protection policies across sites.
When an IP group is referenced in a Web protection rule, the restrictions specified in Match Conditions apply.
IP groups are supported only for the Standard and Enterprise plans. Quotas are calculated on a per-site basis:
A maximum of 100 IP groups can be configured for each site.
The total number of IP addresses and CIDR blocks contained in all IP groups of a site cannot exceed 5,000 for the Standard plan or 50,000 for the Enterprise plan. No separate quota is imposed on the number of IP addresses or CIDR blocks contained in an individual IP group.
Scenario 1: Group Management of IP Information with Business Threats
Example Scenario
A large game customer has connected sites example.com and site.com. Currently, through the security intelligence library and their own business security, a blocklist of IPs with business threats has been identified. These IP addresses will change dynamically, so they need to be updated in real-time and applied to all site domain names, instantly blocking these IPs.
Directions
1. Log in to the Tencent Cloud EdgeOne console, enter Service Overview in the left menu bar, and click the site to be configured under Website Security Acceleration.
2. On the site detail page, click Security > General Settings.
3. In the IP groups tab, click Edit.
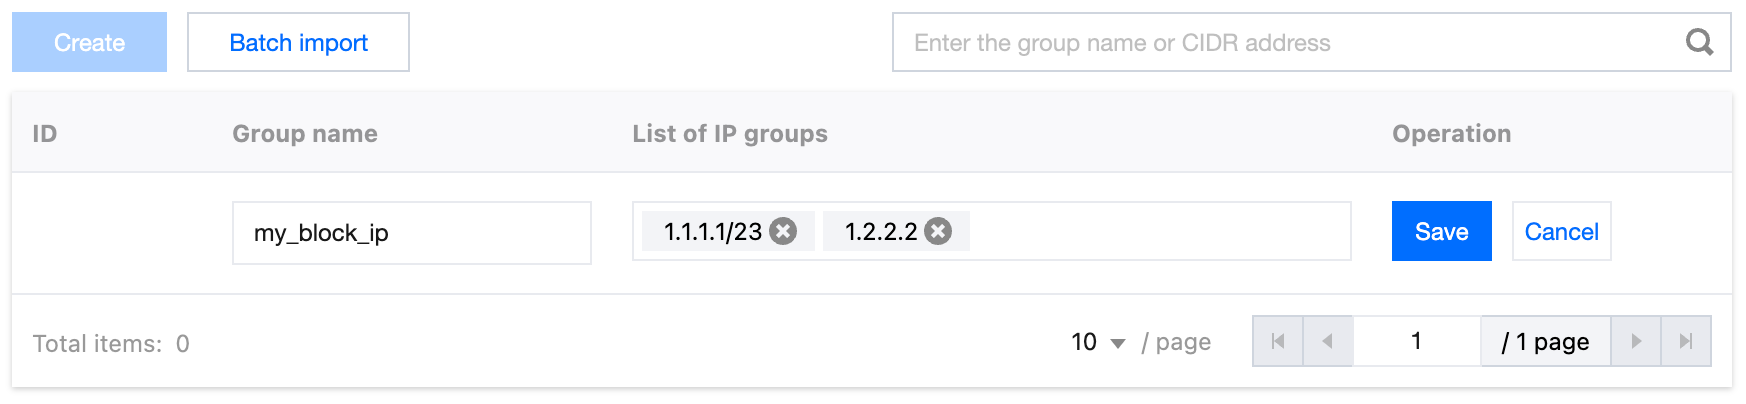
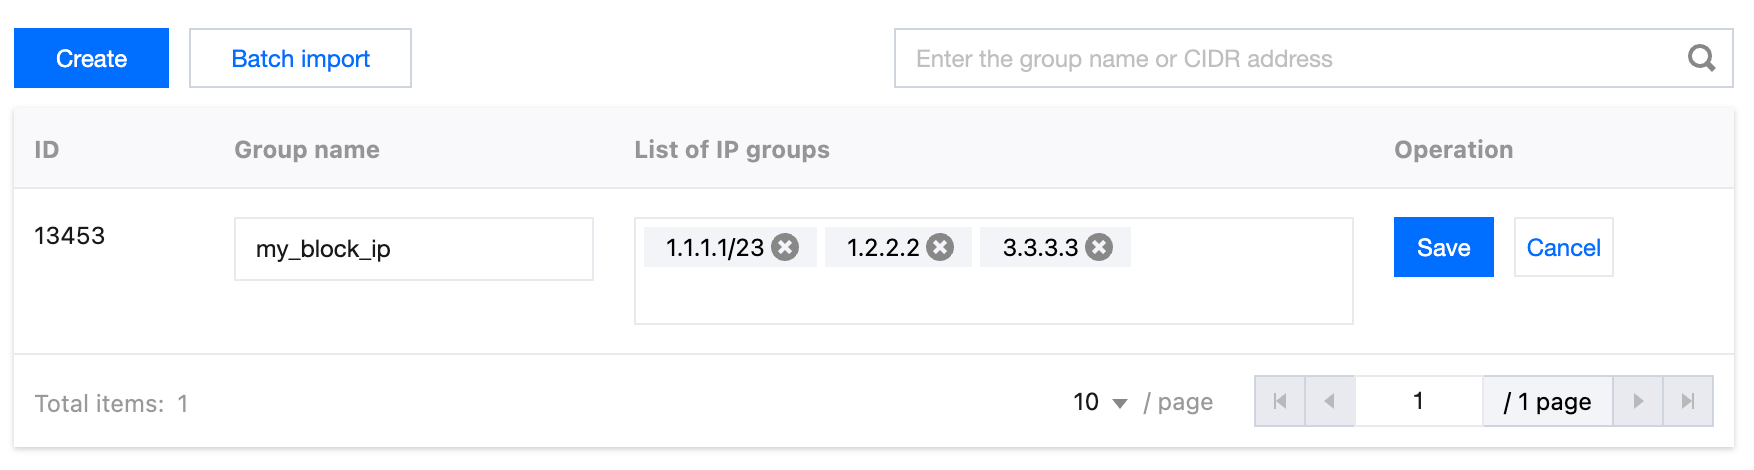
4. Click Create to create a group. Enter the group name and the IP address or IP range contained in the group, such as 1.1.1.1/23 and 1.2.2.2. Separate multiple IP addresses with carriage returns.
5. Click Save to complete the IP group creation.
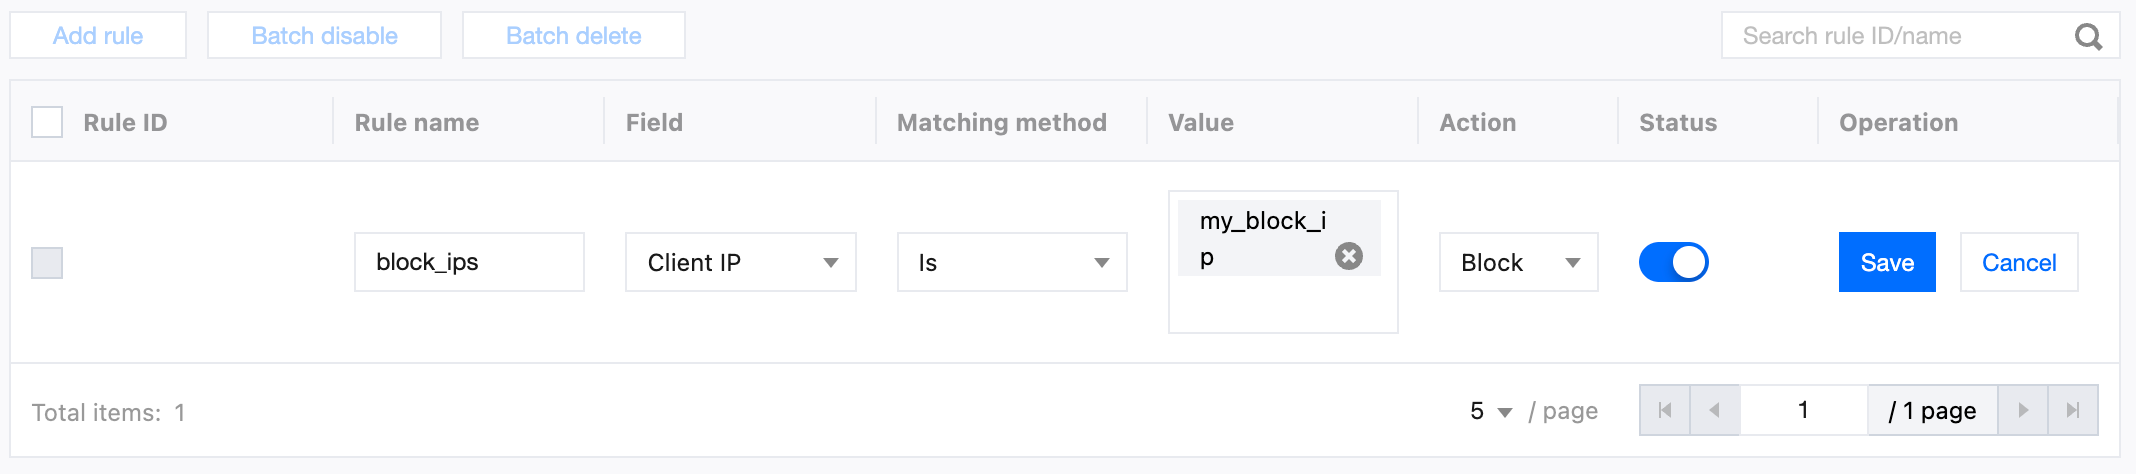
6. After the IP group is created, to disable all IP address access within the group as in this scenario, you can add a basic access control rule on the Web Protection page for example.com and site.com. When adding the rule, select Client IP address equals the group name and set the action to Block. This blocks all IP address access within the group and dynamically updates based on the IP addresses contained in the group. For detailed configuration steps, refer to Custom Rules.
7. (Optional) After configuring the rules, if you identify new risky IPs that need to be added to the group and applied to all sites, you can follow steps 1-3 to re-enter the site where the template was created, click Edit, enter the new IP addresses, and click Save to apply the new IPs to all protection policies that use this group.
Scenario 2: Adding Automatically Expiring IPs in Batch to an Existing IP Group
Example Scenario
An e-commerce customer has configured a long-term valid custom interception rule on the site example.com, referencing the IP group named block_ip to manage blocklist IPs in a unified way. During promotional events, a batch of IPs exhibiting risk behaviors such as malicious crawling and abnormal order placement were identified through monitoring. Since these risks only exist during the activity period, the customer wants to temporarily add these IPs to block_ip and set a unified expiry date, automatically removing them at the end of activity to avoid long-term blocking of legitimate users, while keeping the existing interception rules in effect without additional maintenance of new protection policies.
Directions
1. Log in to the EdgeOne console, enter Service Overview in the left menu bar, and click the site that needs to be configured under Website Security Acceleration.
2. Click Security Protection > General Settings to enter the configuration options details page.
3. In the IP group card, locate the target IP group (such as block_ip), then click Edit.
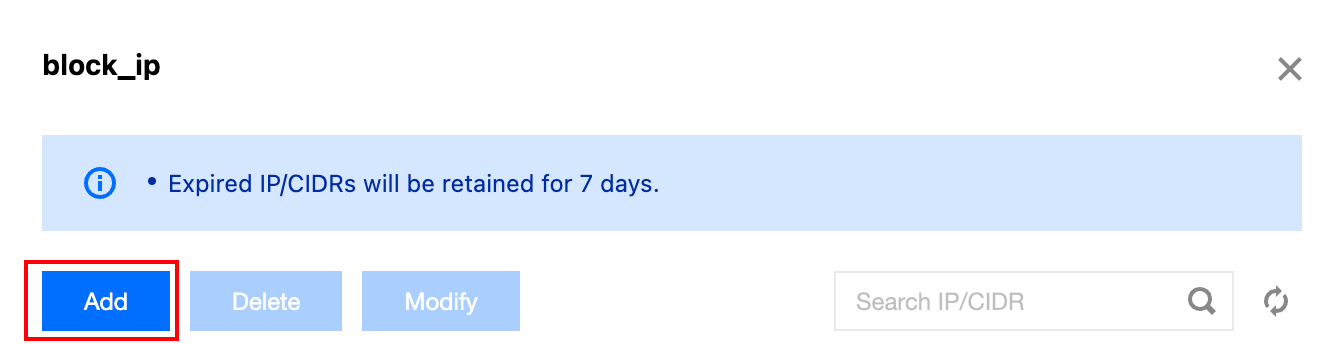
4. In the editing page, click Add.
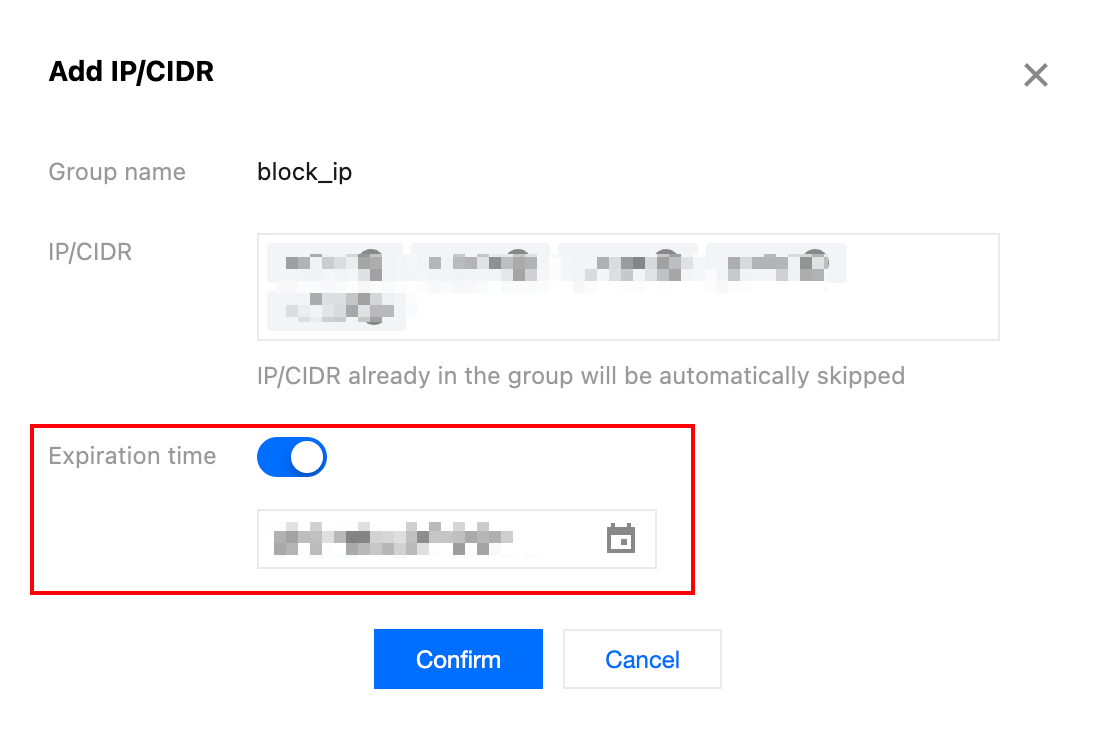
5. In the pop-up window for adding IP or ranges, input the IP address or ranges that need temporary control (bulk entry is supported, multiple addresses are separated by pressing enter). Check Expiration time and set the expiration time.
6. Click Confirm. Once saved, the temporary control IP will take effect immediately and be automatically removed from block_ip upon expiration.
Scenario 3: Adjusting the Expiry Time of IPs with Scheduled Expiration
Example Scenario
In the block_ip IP address group for the site example.com, a batch of IP addresses identified as sources of abnormal requests were set to expire in 7 days. Subsequent analysis revealed that the attack behavior was still ongoing, requiring the expiry time for these IP addresses to be extended by 14 days.
Directions
1. Log in to the EdgeOne console, enter Service Overview in the left menu bar, and click the site that needs to be configured under Website Security Acceleration.
2. Click Security Protection > General Settings to enter the configuration options details page.
3. In the IP group card, locate the target IP group (such as block_ip), then click Edit.
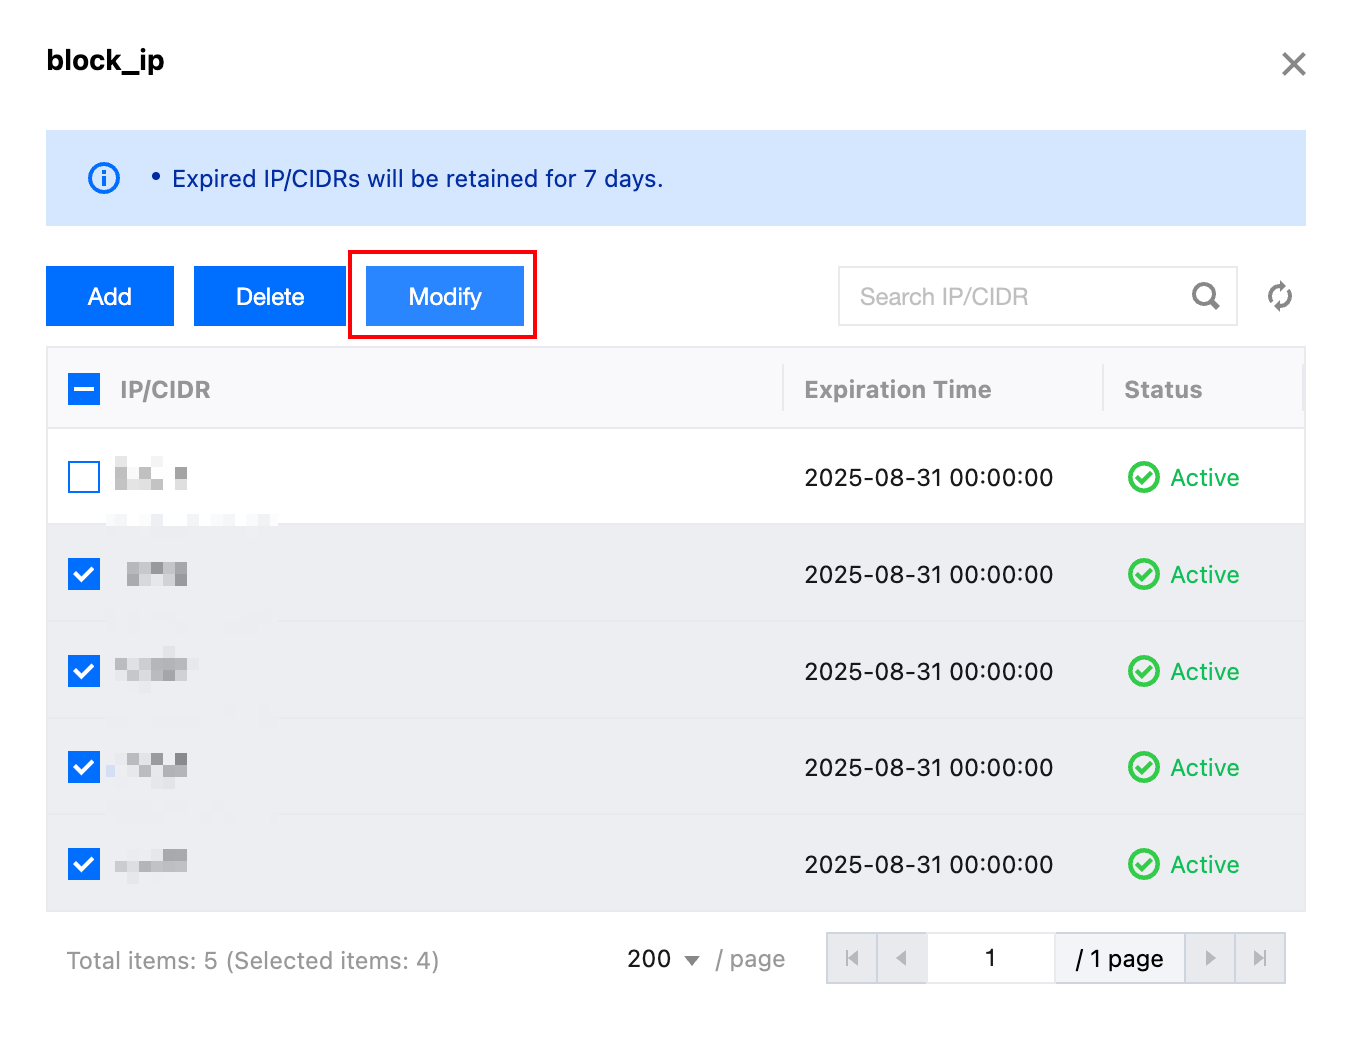
4. On the editing page, select the IP address or ranges that need expiry time adjustment, then click Modify.
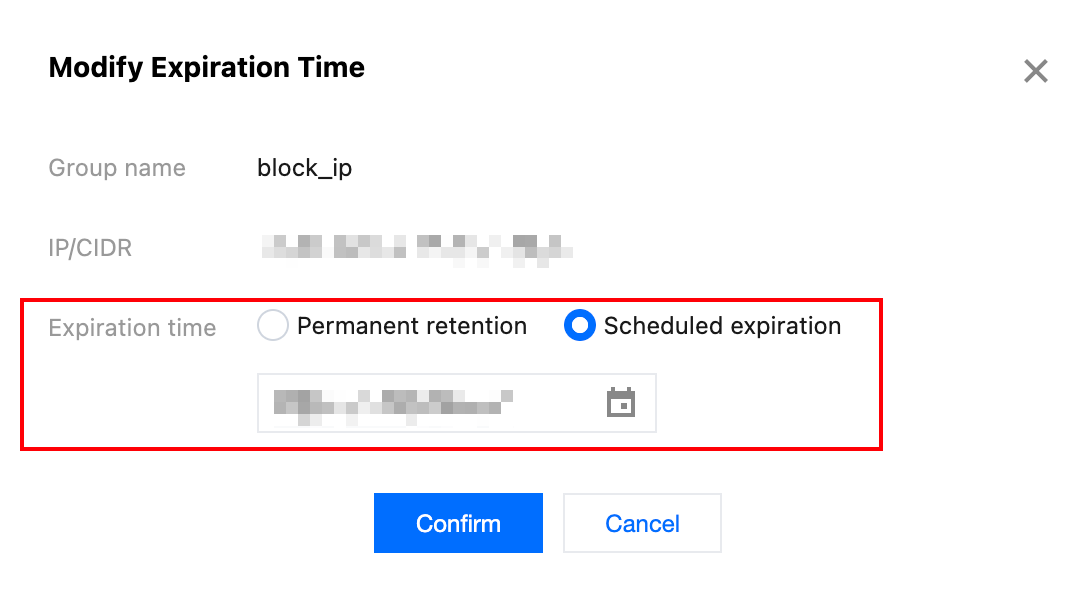
5. In the pop-up window for modifying scheduled expiration time, set a new expiry date.
6. Click Confirm. Once saved, these IPs will be automatically removed based on the latest expiry time.